User Guide
A complete tutorial regarding how to use GoSurvey. We have covered and explained everything related to the working of GoSurvey and its features.

How to add KML layers and export KML?
A KML layer draws a boundary on the Spatial Report map. KML export downloads the response pins as a KML file.
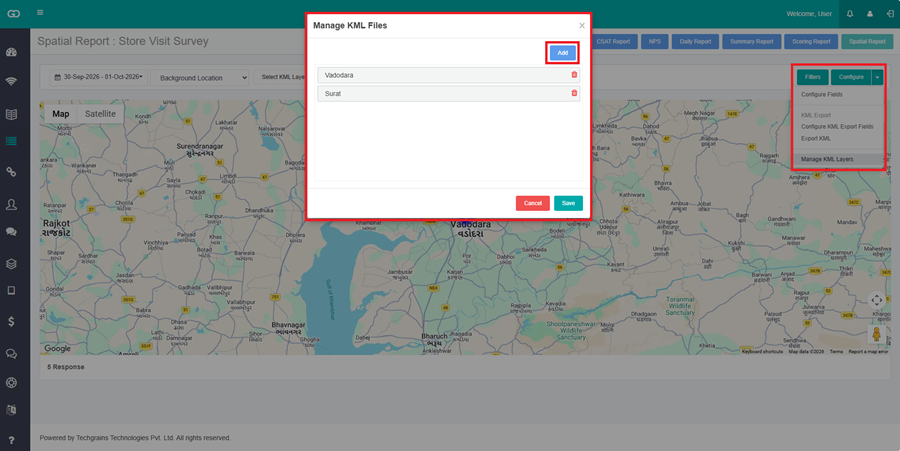
Open the Spatial Report, then click Configure. Under KML Export, the menu has Configure KML Export Fields, Export KML, and Manage KML Layers.
Add a KML layer
Step 1:
Click Configure, then Manage KML Layers. The dialog title is Manage KML Files.
If no layer is saved yet, the dialog shows No Data Available.
Step 2:
Click Add.
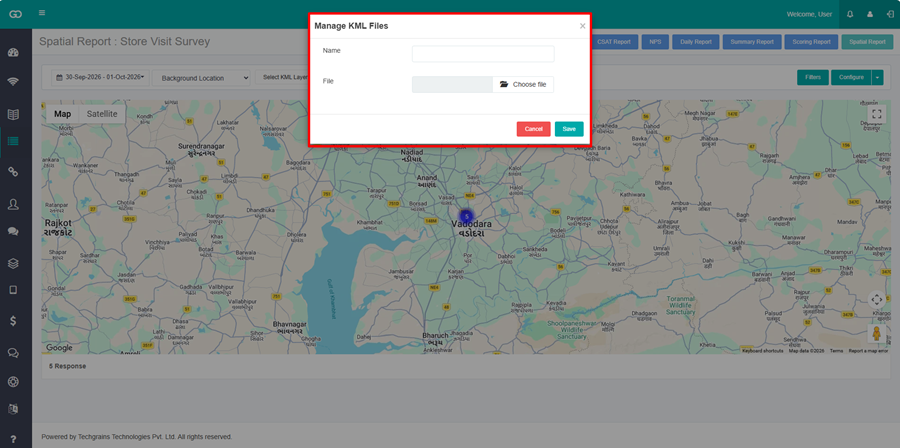
Enter Name. Under File, choose a .kml file. Click Save.
The message KML file imported successfully. appears, and the layer is added to the list. Click the delete icon to remove a layer from the list, then click Save.
Cancel on the add form returns to the list. Cancel on the list closes the dialog without saving the list.
Step 3:
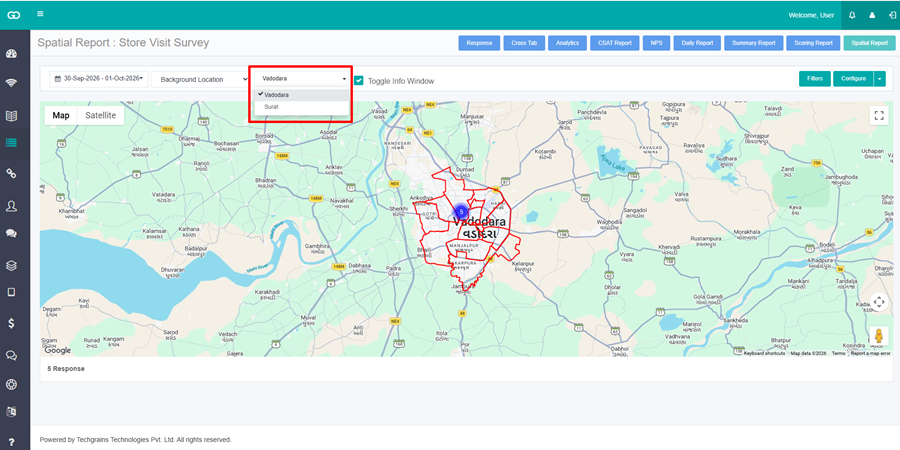
On the Spatial Report, open Select KML Layer. This list appears after a layer is saved. Select one or more layers. Each selected layer is drawn on the map.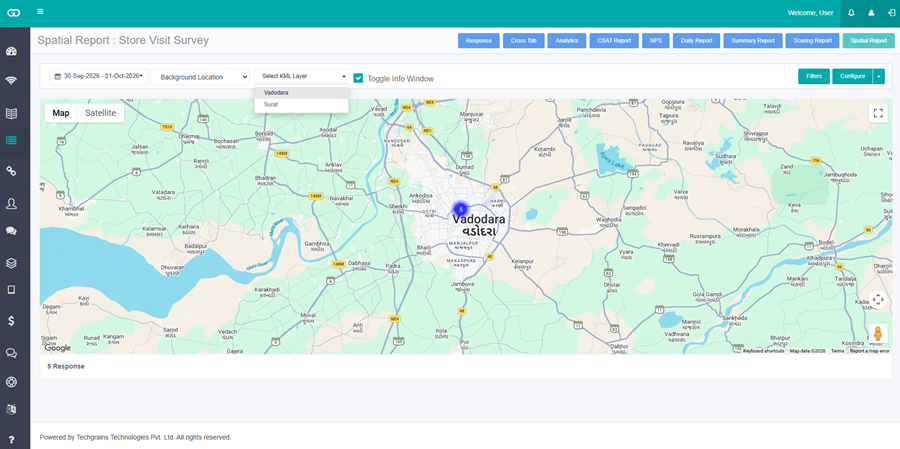
Step 4:
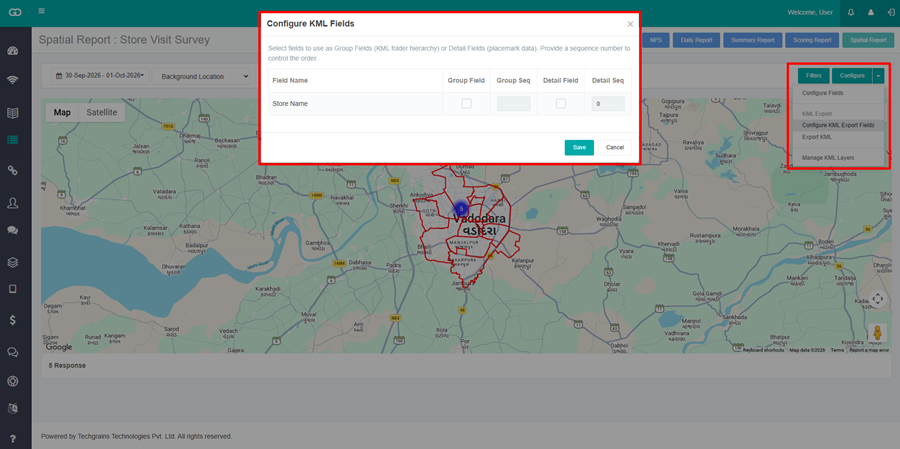
Click Configure, then Configure KML Export Fields. The dialog title is Configure KML Fields.
The columns are Field Name, Group Field, Group Seq, Detail Field, and Detail Seq.
A Group Field sets the folder order in the KML file. A Detail Field is the information stored on each pin. Enter Group Seq or Detail Seq to set that order. A field is one or the other. Checking Group Field clears Detail Field, and checking Detail Field clears Group Field.
At least one Group Field and one Detail Field are required. Each checked field needs a sequence number of 1 or more. Click Save. The message KML configuration saved successfully. appears.
Step 5:
Click Configure, then Export KML.
The file downloads for the responses on the map. The date range and Filters on the Spatial Report apply to this file.