User Guide
A complete tutorial regarding how to use GoSurvey. We have covered and explained everything related to the working of GoSurvey and its features.

How to view collected data?
The responses collected from mobile devices and/or web forms are stored in your account under the given survey.
To view the collected responses, follow the below steps:
Step 1:
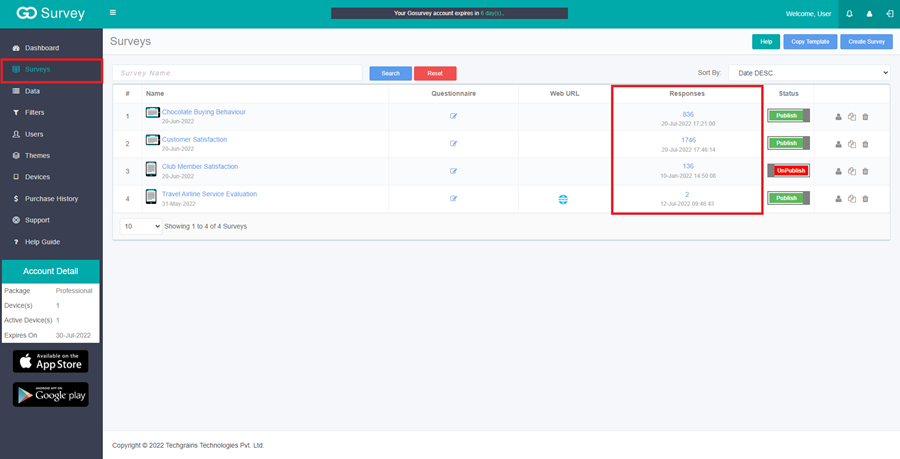
Click on the Surveys link on the left side panel. On the right hand panel there will be the list of surveys which the user has created.
The survey list will show the below information.
Name, Questionnaire, Responses and Status - here Responses show the number of response count collected for a survey
Step 2:
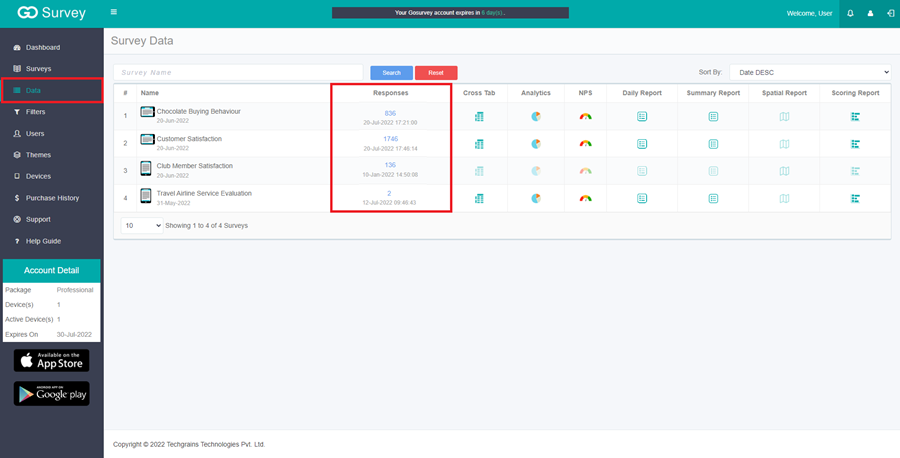
There are two ways to view a survey collected data - One is through ‘Responses’ and the other is through ‘Data’ on the left side panel.
-
From ‘Data’, user can view all different forms of collected data directly - Responses, Analytics, NPS, Daily & Summary Report, Spatial Report, Scoring Report.
Below steps are for viewing data from ‘Responses’. -
Click on the Responses column of the particular survey to view the survey responses.
Step 3:
A screen will appear with all the responses collected by the user till date.
At the top, there is a row of buttons linking to different data sets like Cross Tab, Analytics, NPS, Daily Report, Summary Report, Scoring Report, Spatial Report.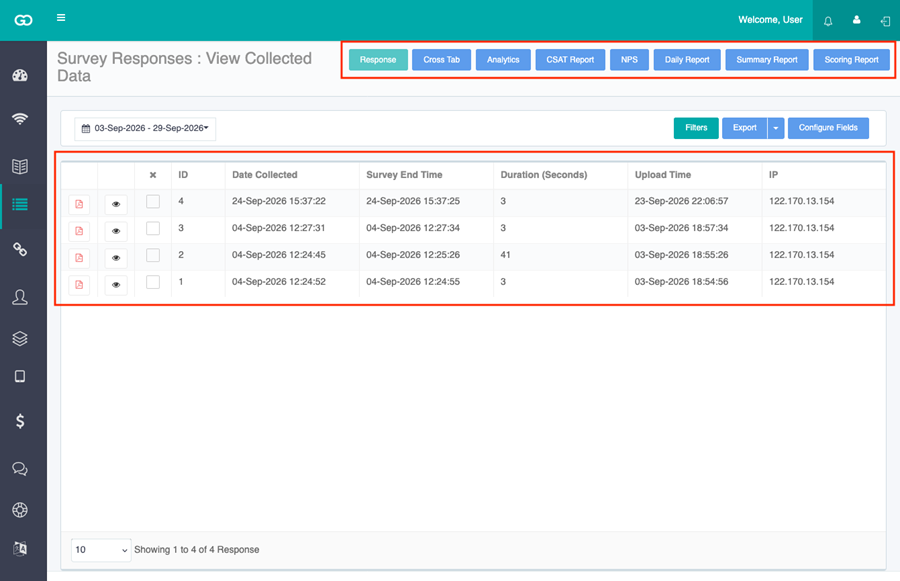
Step 4: Filters
At the top left, open the date range and choose the start and end dates. The list shows responses collected in that period. The default range starts from the first collection date through today.
Click Filters. Next to Data Filter, click +. The Add Data Filter popup opens. Choose a Question, an Operator, and a Response, then save. The list shows the matching responses.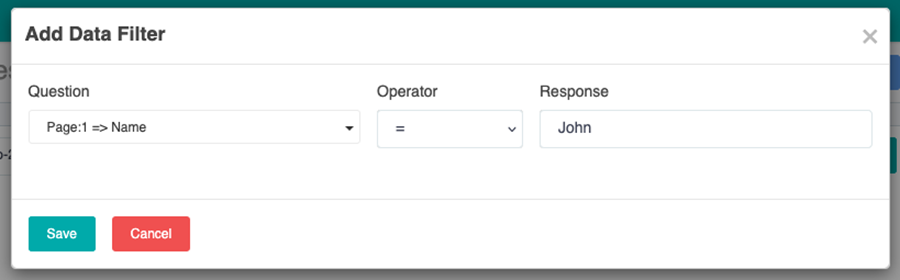
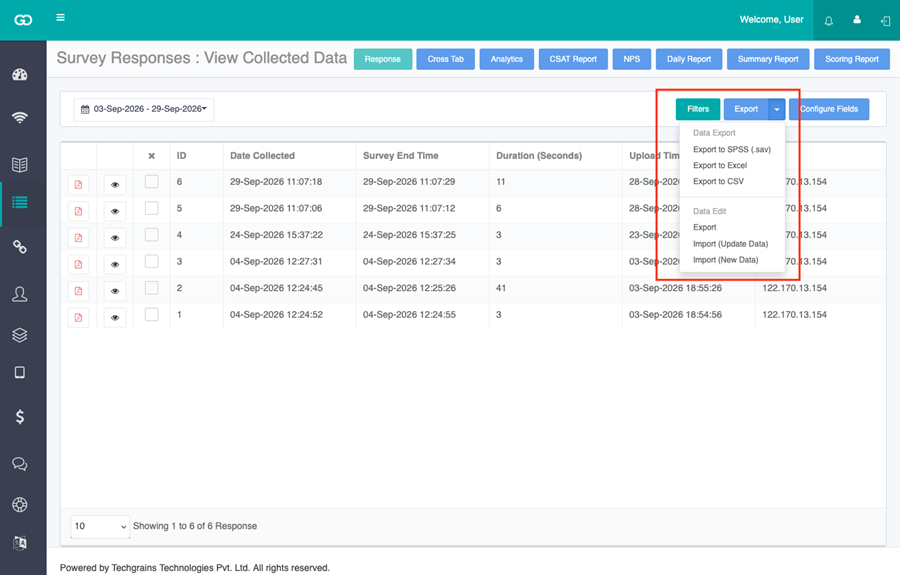
Step 5: Export
Click Export. The Export Options popup opens.
Choose a File Format: Xlsx, CSV, SPSS. Under Additional Options, you can check Exclude Hidden Questions.
When Question Group is shown, choose All Questions to export every question, or choose a saved group to export only those questions.
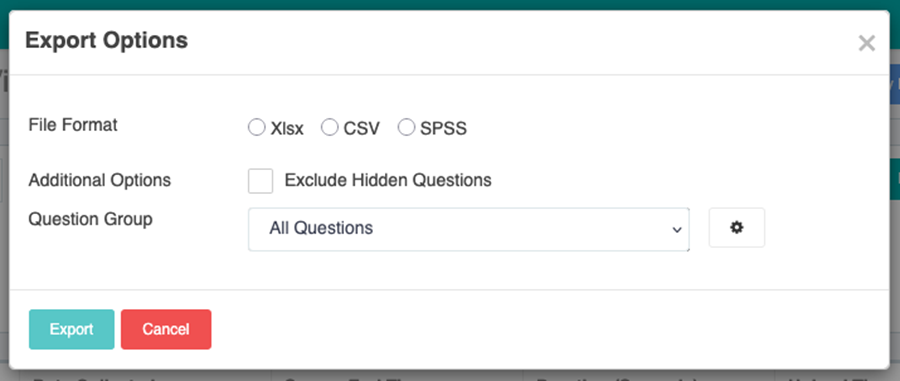
To create or pick a group, click the settings icon next to Question Group. The Manage Question Groups popup opens.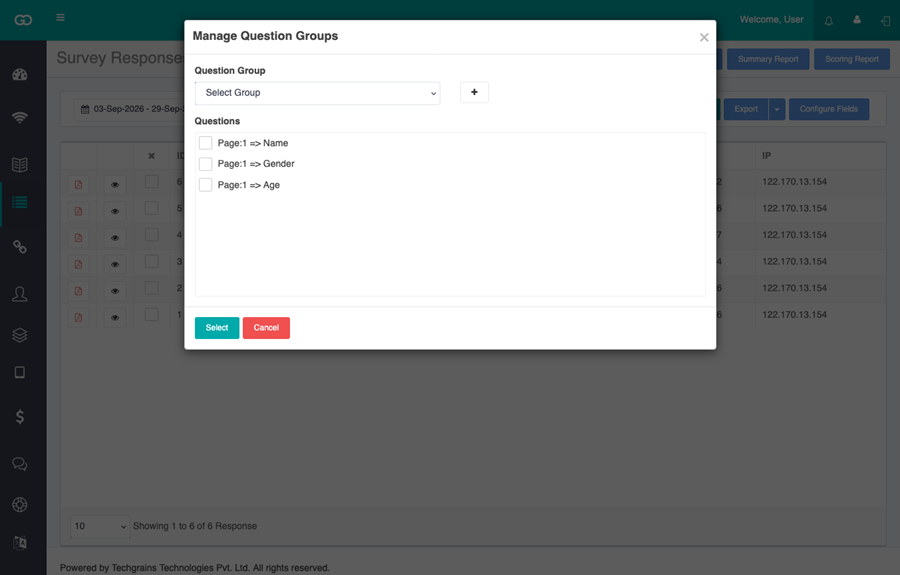
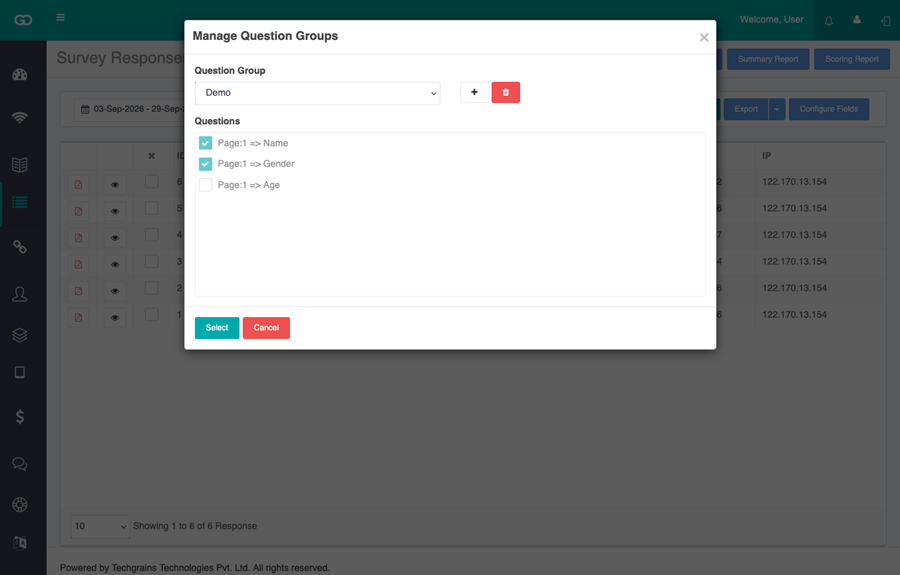
In Manage Question Groups, open Question Group and choose a group, or click + to add one. Enter the Group Name, check the questions to include, then click Save.
To use the questions for this export without saving a group, check the questions and click Select. Question Group then shows Selected Questions.
Click Cancel to close without changing the export.
Click Export. When the file is ready, the message Export data file is now available. Click on the notification icon to download the file. is shown. Open the notification and download the file. You can also open Export File List from Surveys.
The arrow next to Export opens the same formats under Data Export:
- Export to SPSS (.sav)
- Export to Excel
- Export to Excel With Media
- Export to PDF
- Export to CSV
Which options you see depends on your plan and the survey.
Under Data Edit, Export downloads a file you can update. Import (Update Data) loads that file back into the responses. Import (New Data) adds new rows when that option is available.
Step 6: Configure Fields
Click Configure Fields. Move fields between Available and Selected. Drag the selected fields to set the column order, then click Save.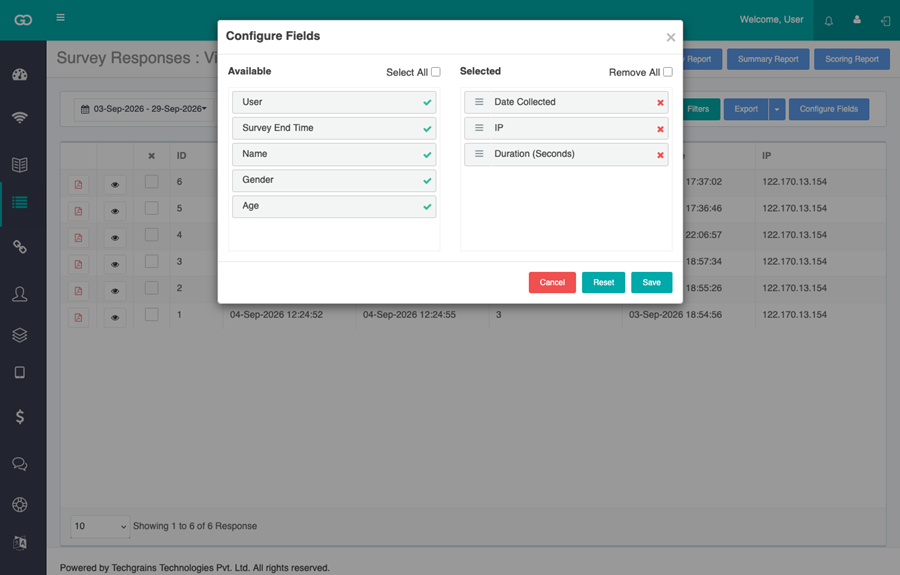
Step 7:
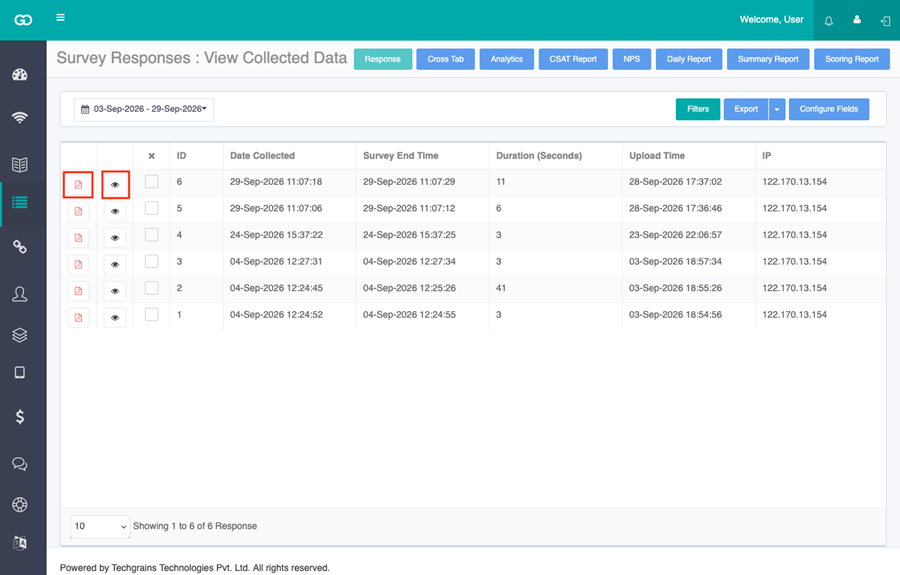
On each response row:
- The PDF icon saves that response as a PDF.
- The eye icon opens the full form.
Click the eye icon to open the response. The form shows the answers, the date and time collected, and other details such as end time and duration when they are available.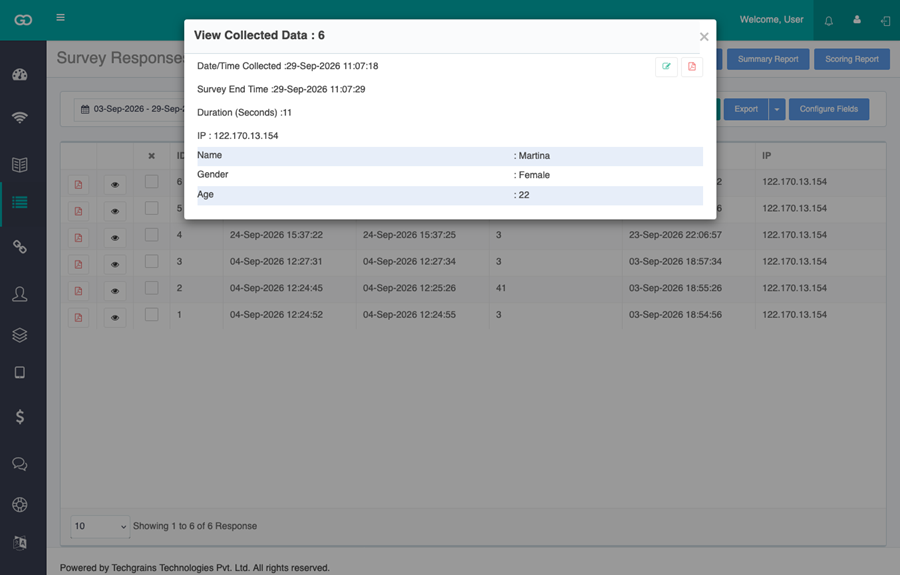
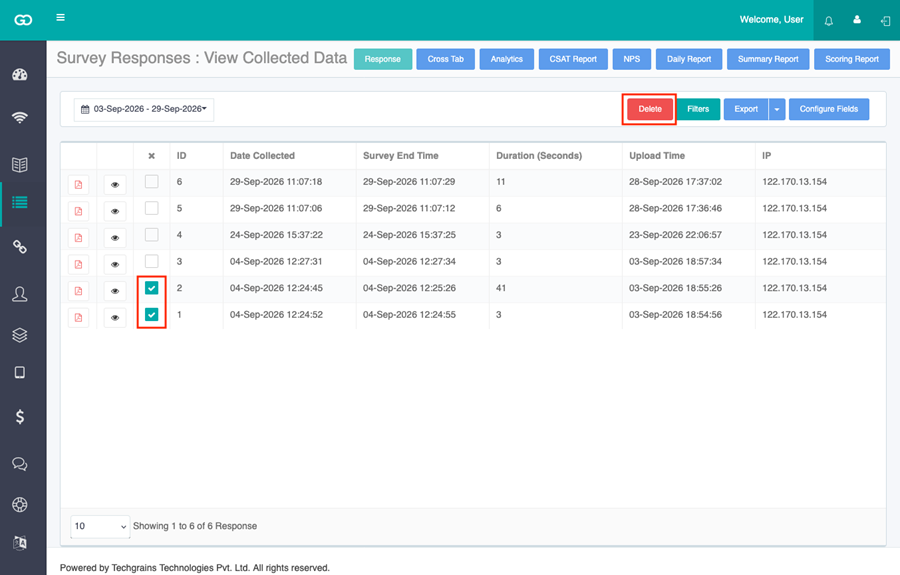
To delete responses, check one or more rows. The Delete button appears at the top. Click Delete. Enter the reason for deletion, then click Yes to remove those responses, or No to cancel.