User Guide
A complete tutorial regarding how to use GoSurvey. We have covered and explained everything related to the working of GoSurvey and its features.

How to configure response based notification
Step 1
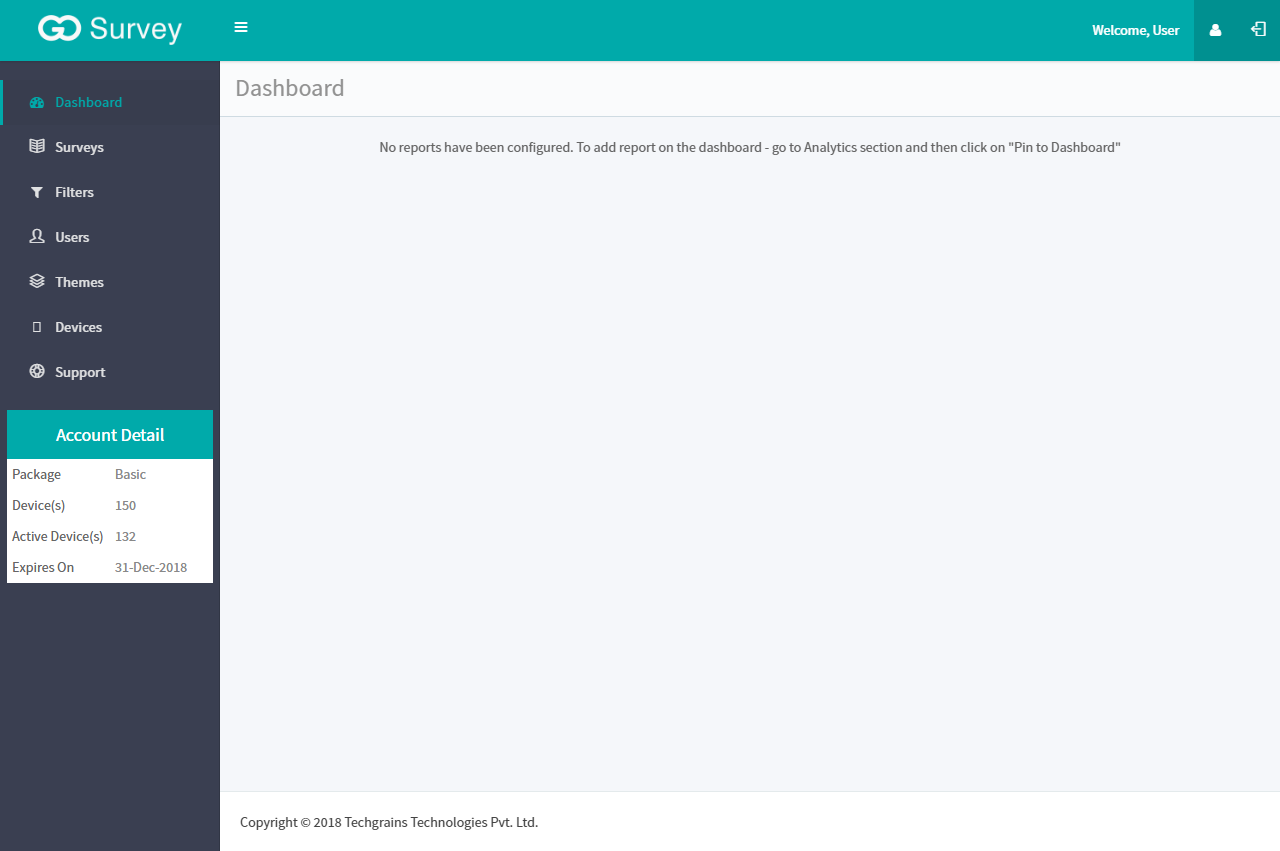
Login to your GoSurvey account with your username & password which you have set while creating the account.
After login, it would show the dashboard.
Step 2
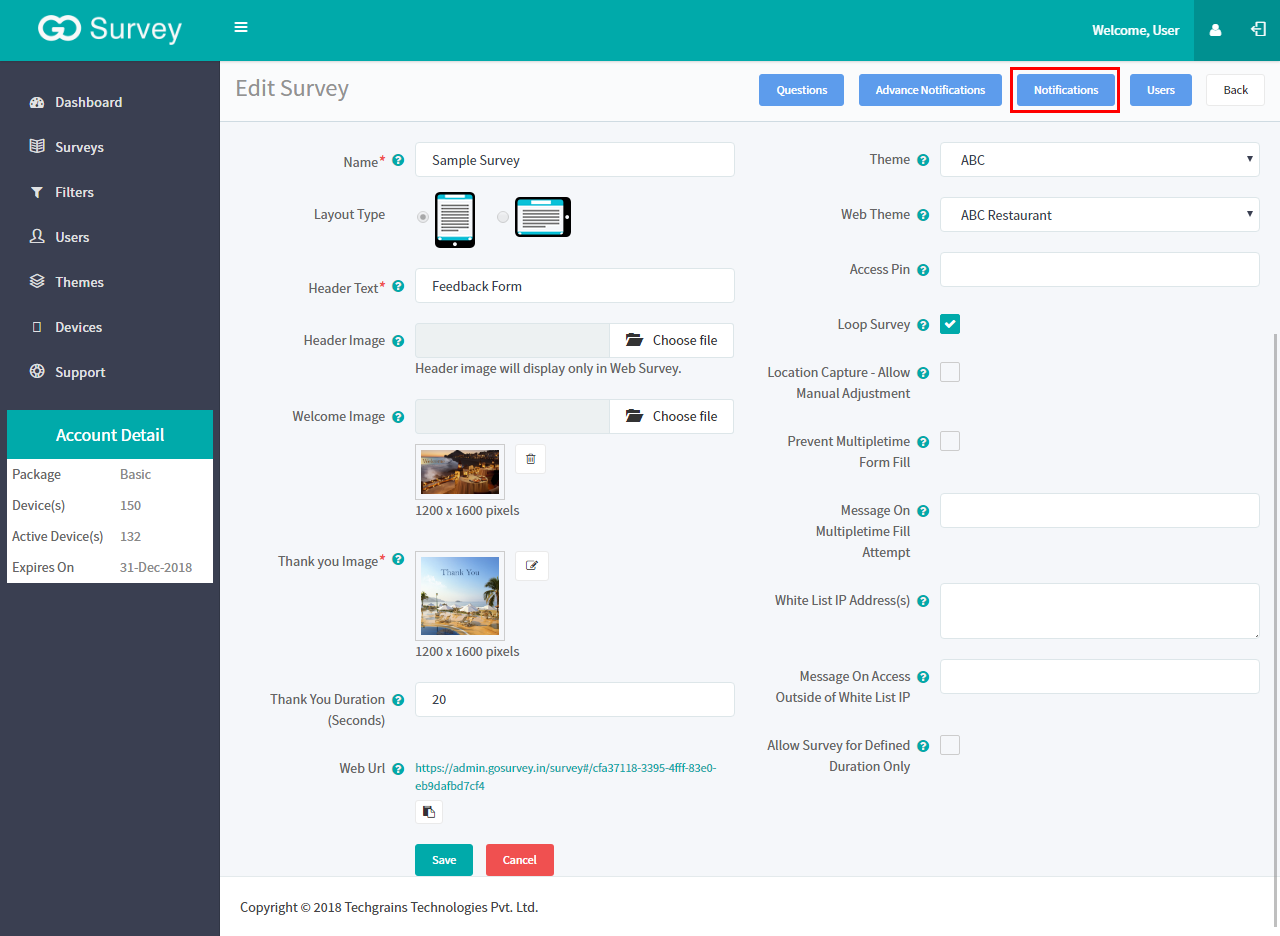
- Click on the specific survey from the Survey list screen into which the notifications has to be get configured. Click on Notifications button on the top right corner to add the notification.
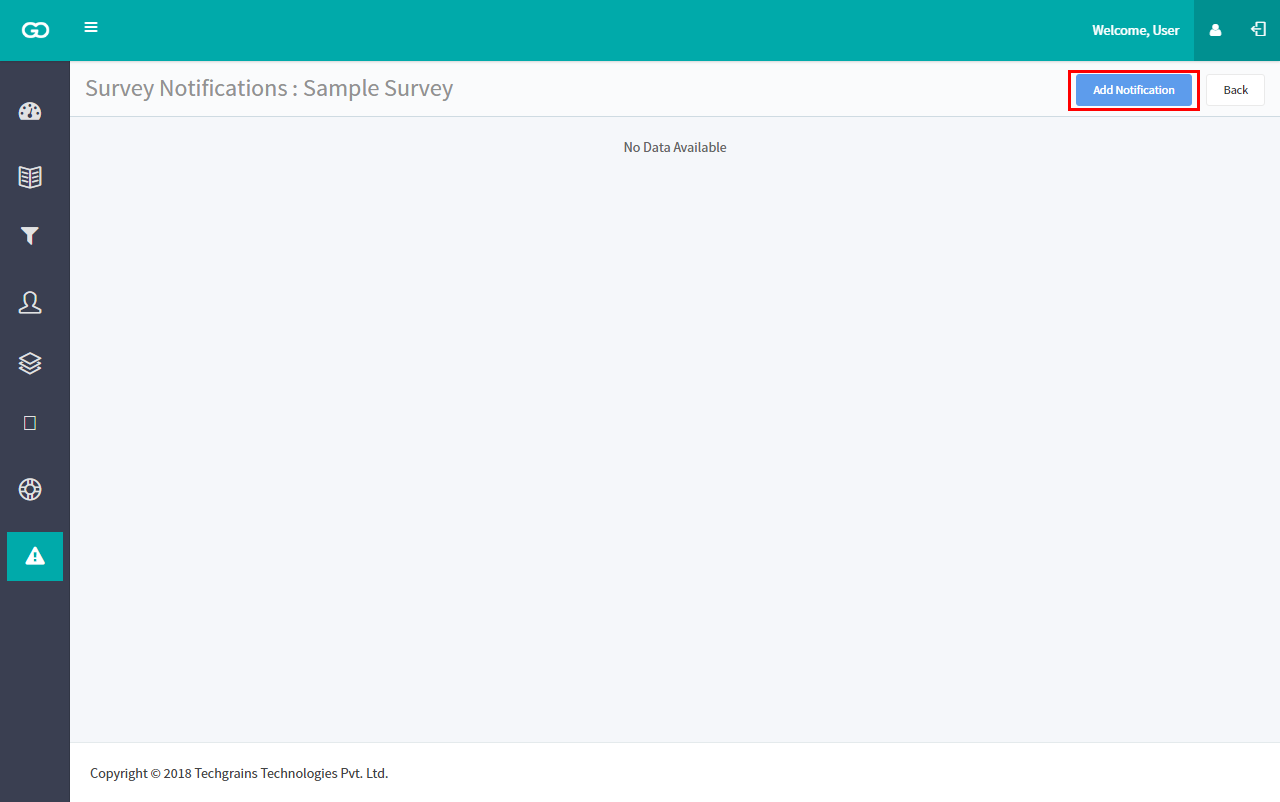
- A screen will appear , Click on Add Notification on the top right corner to configure the notifications.
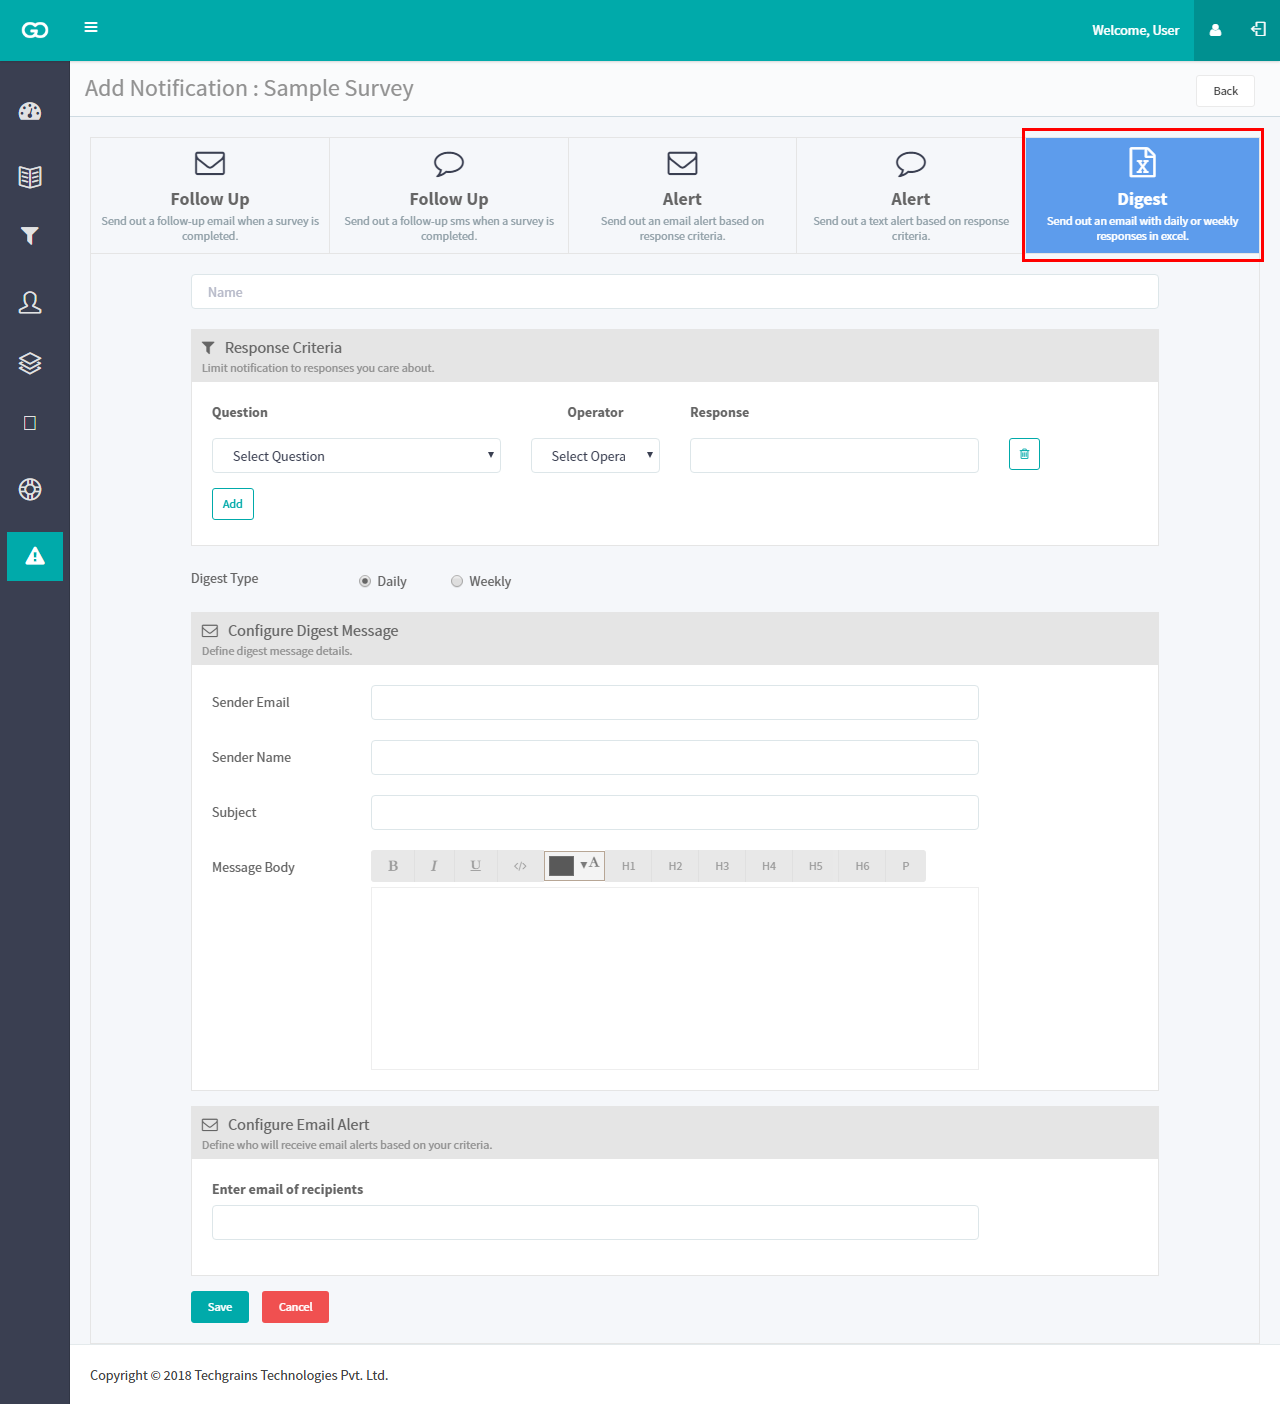
- On clicking Add Notification ,a screen will show up displaying the sort of notifications.
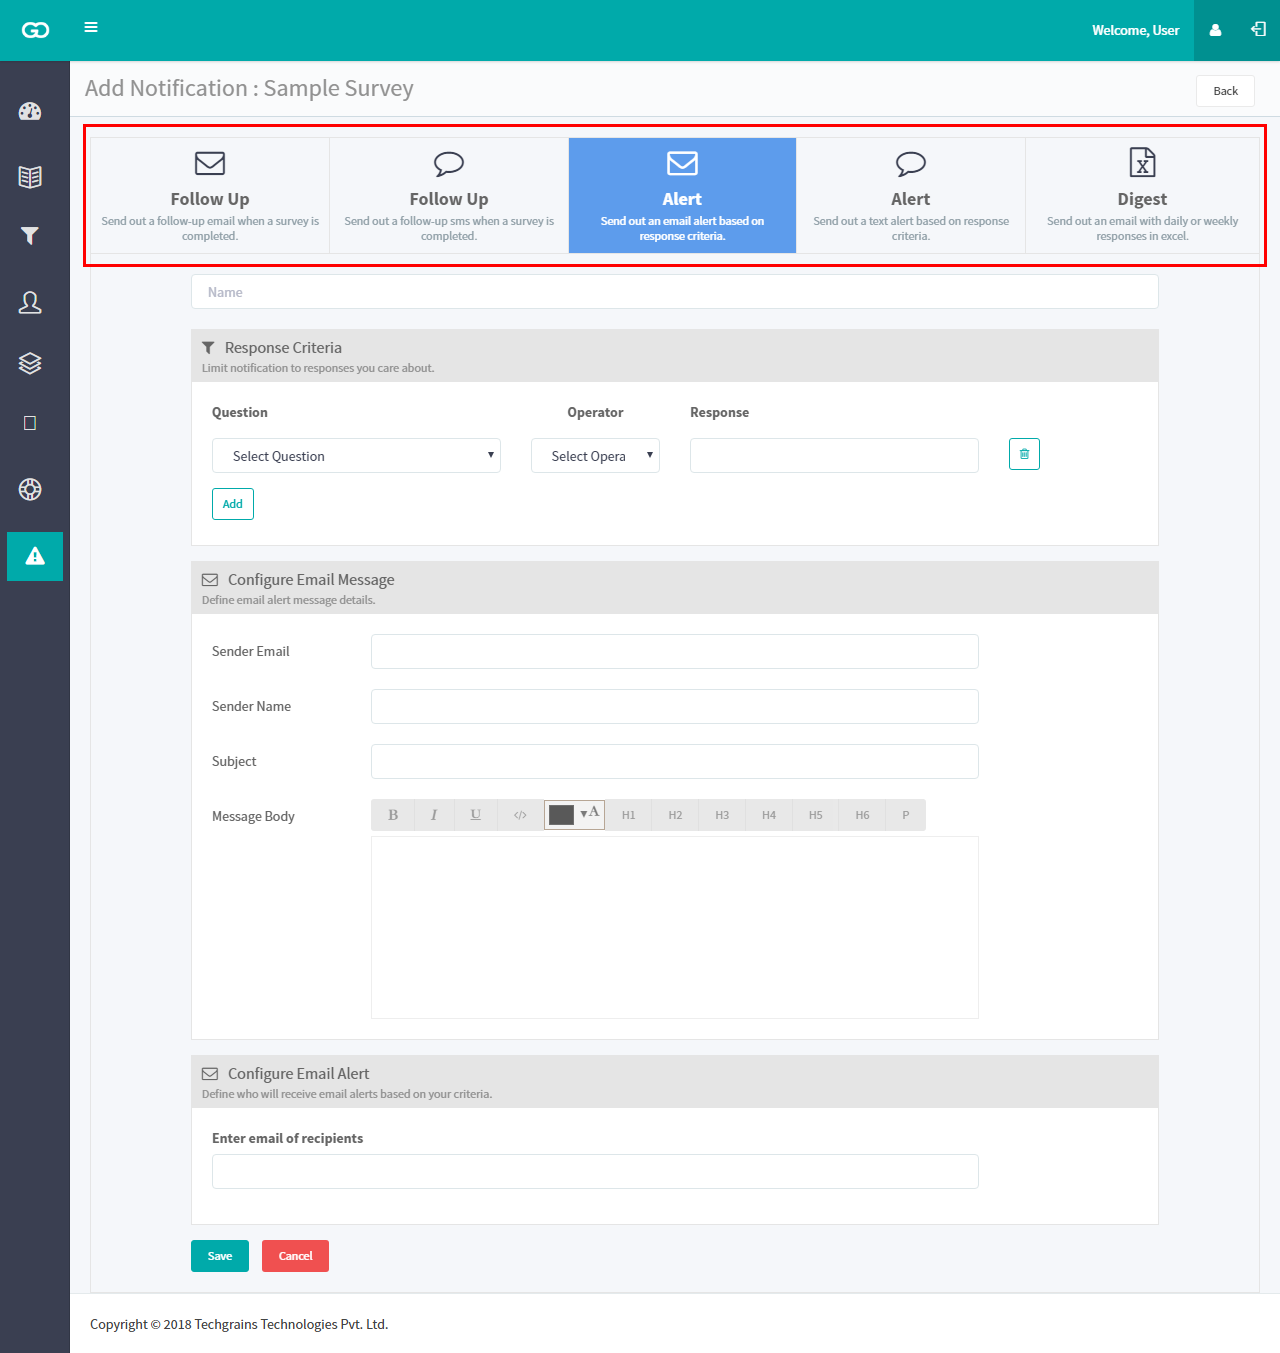
- User has to select the type of notification that has to configured.
In GoSurvey user can also manage the surveys once they get submitted. User can send courtesy Emails or SMS to the respondent in relation to the requirement, this helps the user to maintain the customer relationship.
User can even send alert Emails or SMS to their customers if they are unhappy or disappointed with the service or behaviour of their staff.
These notifications are configured on basis of the ratings the respondent gives. Suppose if the respondent give poor rating then the user can configure an alert Email or SMS for the question.
GoSurvey avails three types of notifications to the users. They are:
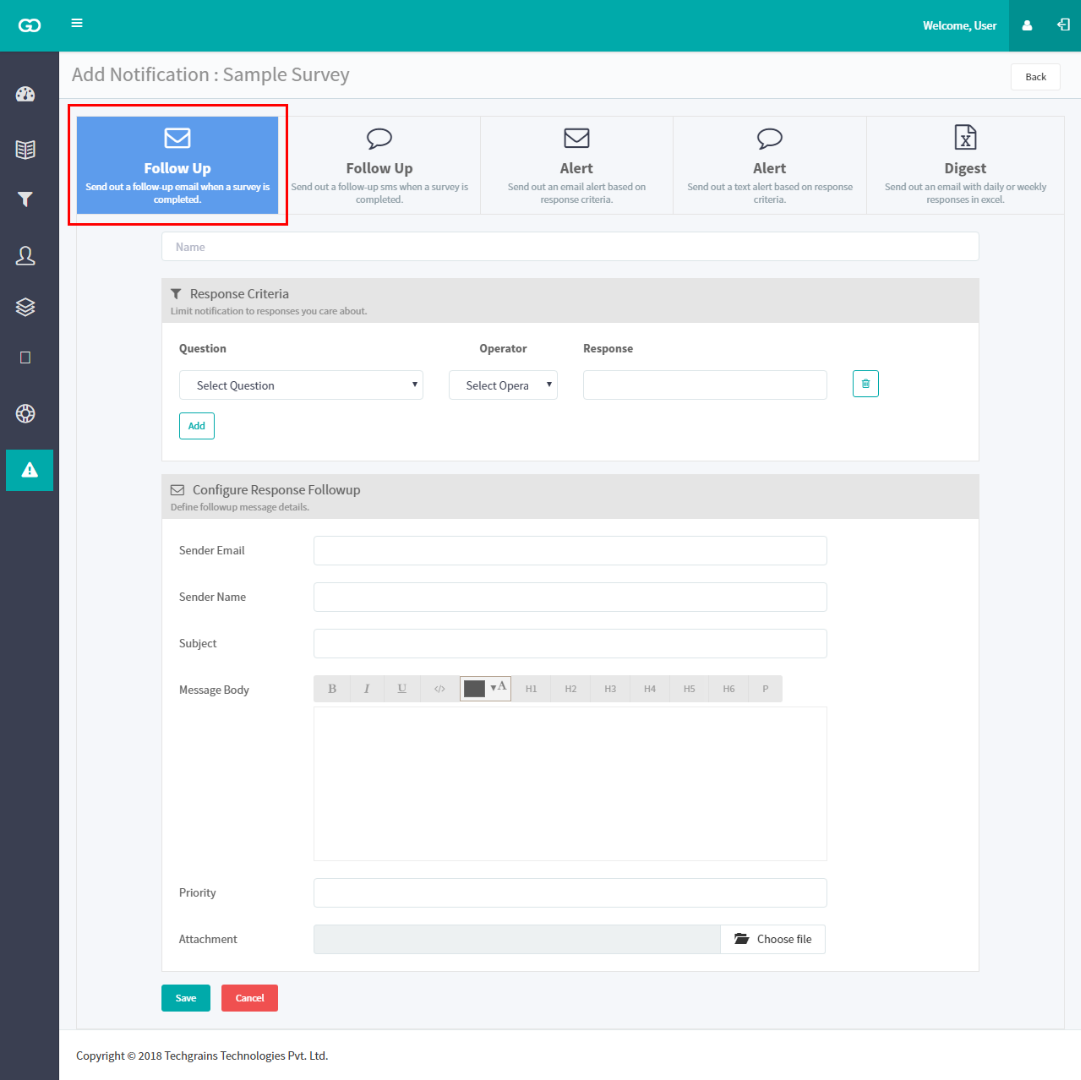
1. Follow Up Email / SMS:
- Send follow up Emails/SMS to your customers/visitors conveying a thank you message or informing about any promotions or offers. This type of courtesy Emails helps the business in strengthening CRM.
- To configure Follow Up Email fill the following fields:
- Write down the name of the notification in the Name field that the user wants to provide for its understanding, the notification name till not be shown up in the Email.
- Select the criteria on which the Email has to be sent. Once the user selects the response criteria the Email will be sent when the configured criteria is selected by the respondent.
- In Sender Email field enter the Email id from which the Emails will be sent.
- The Sender Name will be the name that will be the name of business/user/company which can be easily recognized by the respondent to whom the Email is to send.
- Subject field describes the Subject line of the Email/content.
- Type the Email content according to the necessity.
- The Priority field decides on what preference the user wants to send the auto Email, if there are more than 1 notification configured.
- GoSurvey also has the facility to send any attachment with the Email.
- Additionally, the data form can be inserted by typing @@form@@ in the email body itself and after data collection when the notification email is received, it’ll have the submitted response data form along with the email content.
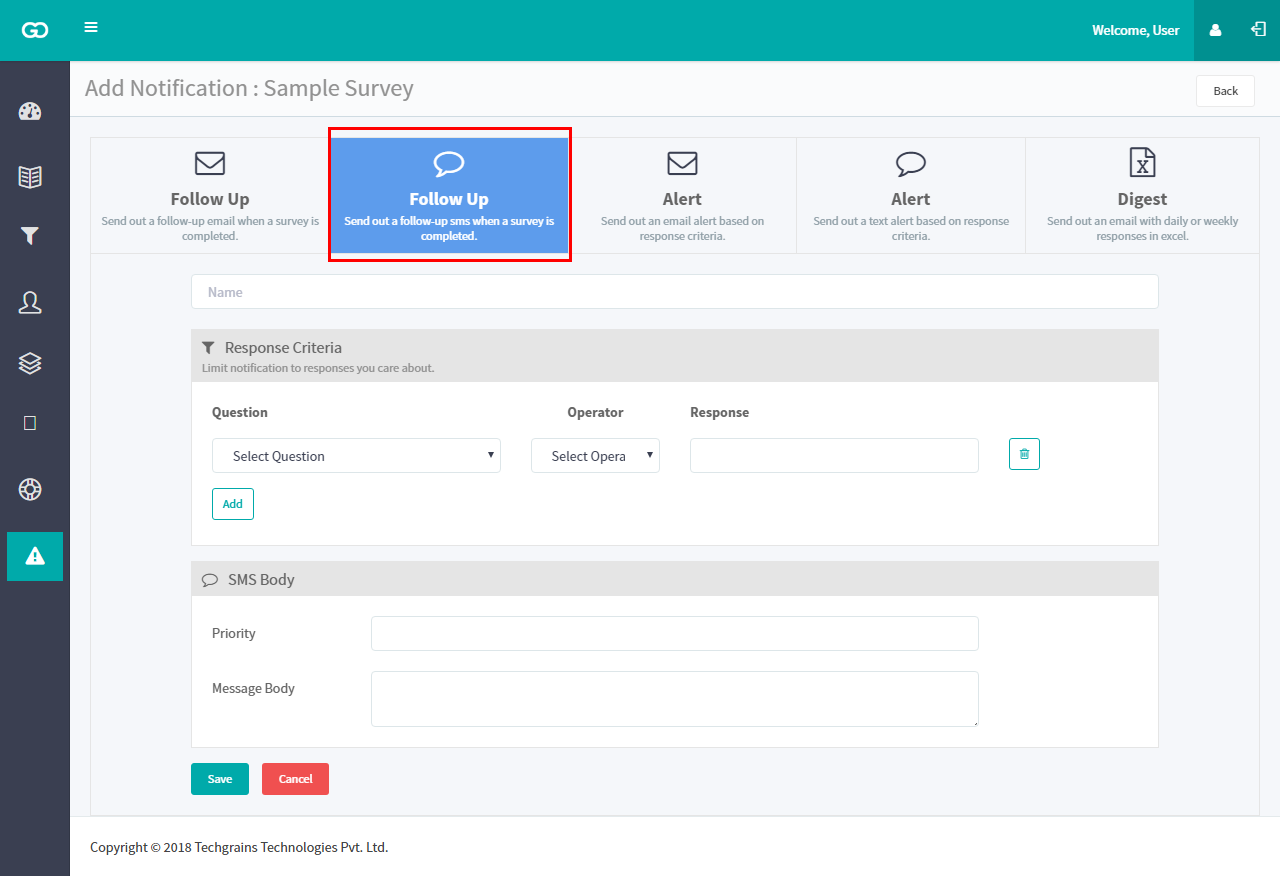
To configure Follow Up SMS fill the following fields:
- Write down the name of the notification in the Name field that the user wants to provide for its understanding, the notification name till not be shown up in the SMS.
- Select the response criteria if the follow SMS has to sent on particular response.
- Mark the priority of the follow up SMS if there are more than 1 follow up SMS configured.
- Type the SMS content user wants to message.
Note: SMS notifications will be available if the SMS feature is included in the opted plan.SMS notifications are charged extra.
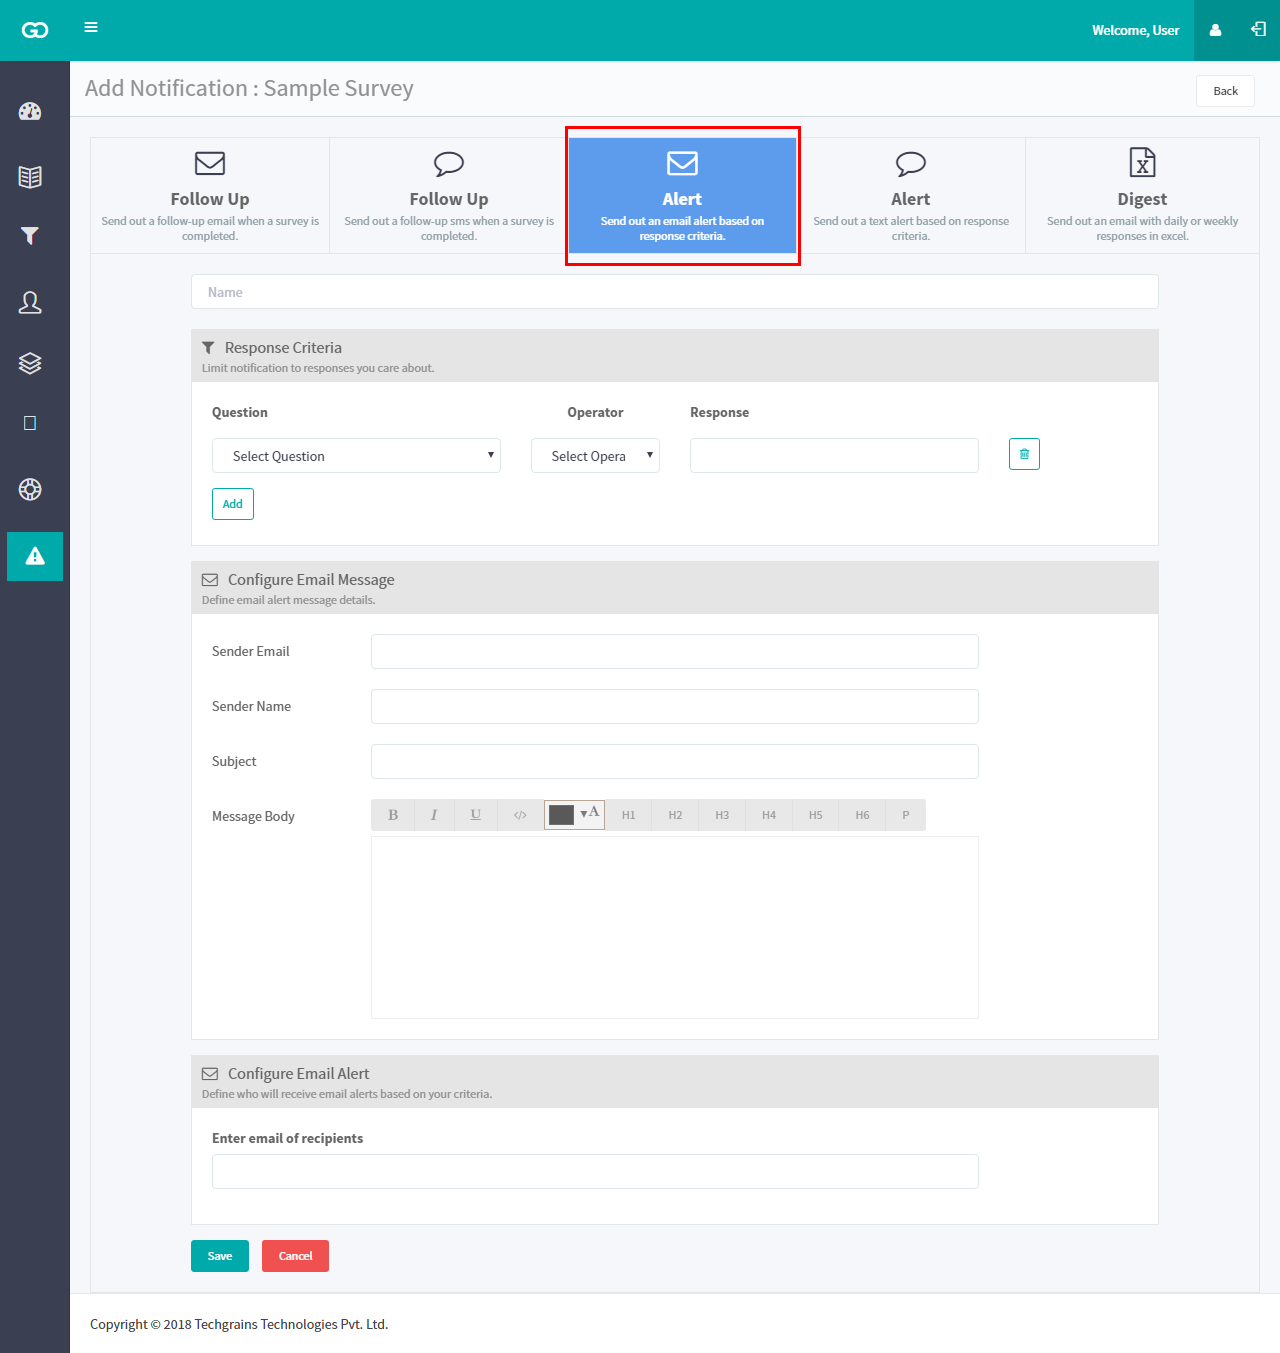
2. Alert Email / SMS:
- It is very important to be aware about the negative reviews from your customers so that improvements can be made on basis of the poor ratings. This kind of notifications helps the owner to take care of the business in the right way. Also customers are to taken care of, after the poor service is provided by sending them apology Emails.
- To configure Alert Email fill the following fields:
- Write down the name of the notification in the Name field that the user wants to provide for its understanding, the notification name till not be shown up in the Email.
- Sender Email will be the Email from whom the Emails will be sent and the respondent can reply on that Email if required.
- Sender Name will be the name which will notify that there is a Negative review from the system.
- Subject will be subject line stating about what the Email is about. For eg : Negative Review from XYZ outlet.
- Message body will be the questionnaire which will be sent to the particular person who will be taking care of the Negative reviews.
- Configure Email Alert - Here the user can allocate the alert Emails depending upon the filters created. User will have to enter the Email id of the person who looks up to the Negative review Emails and can take any action upon it.
- The response criteria is a mandatory field, here the user has to configure the criteria on basis of which the user will be notified of such Emails.
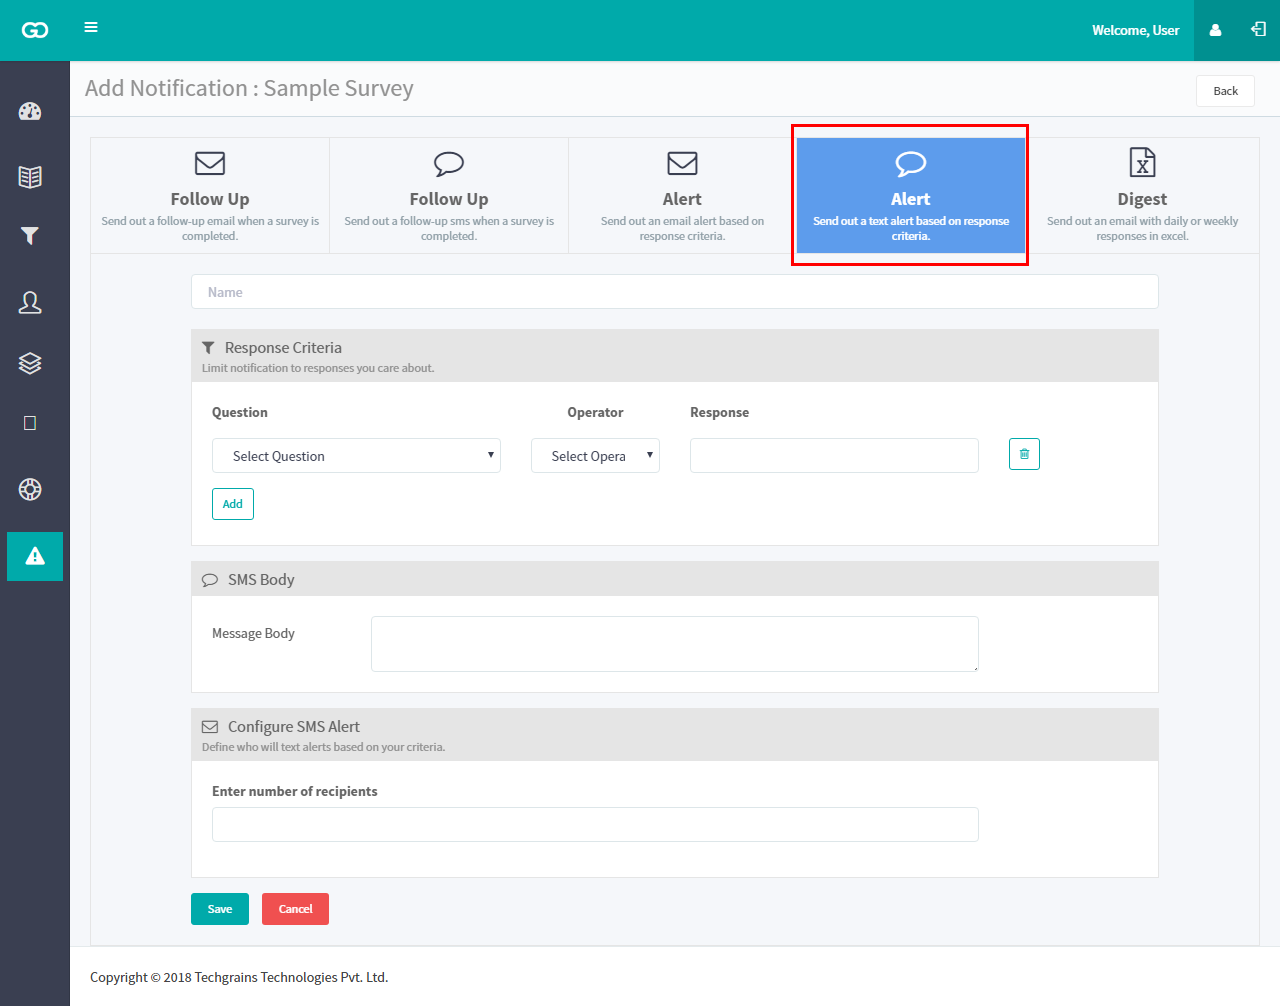
To configure Follow Up SMS fill the following fields:
- Write down the name of the notification in the Name field that the user wants to provide for its understanding, the notification name till not be shown up in the SMS.
- Select the response criteria and set a rule on which the alert SMS has to be sent.
- Type the alert message that needs to notified to the user.
- Configure SMS Alert - Here the user can allocate the alert SMS depending upon the filters created. User will have to enter the mobile number of the person who looks up to the Negative review Emails and can take any action upon it.
Note: SMS notifications will be available if the SMS feature is included in the opted plan.SMS notifications are charged extra.
3. Digest Email
- Digest Email is used for the purpose to send the compile report of the responses on daily or weekly basis.
- To configure Digest Email fill the following fields:
- Write down the name of the notification in the “Name” field that the user wants to provide for its understanding, the notification name till not be shown up in the Email.
- Select the criteria on which the Email has to be sent. Once the user selects the response criteria the Email will be sent when the configured criteria is selected by the respondent.
- Select the type of digest Email that needs to be sent. There are two types available - Daily & Weekly
- In Sender Email field enter the Email id from which the Emails will be sent.
- The Sender Name will be the name that will be the name of business/user/company which can be easily recognised by the respondent to whom the Email is to send.
- Subject field describes the Subject line of the Email/content.
- Type the Email content according to the necessity.
- Configure Email Alert - Here the user can allocate the digest Email depending upon the filters created. User will have to enter the Email id of the person who is authorised to take a note of such notifications.
- The excel file will be sent as attachment to the Email recipient on the basis of configuration i.e Daily or Weekly