User Guide
A complete tutorial regarding how to use GoSurvey. We have covered and explained everything related to the working of GoSurvey and its features.

Sub Form
A Sub Form is considered to be a part of the main survey form or the parent survey form. A Sub Form contains set of repetitive questions. It's helpful when there is a situation where you want to collect information that gets repeated with each response.
So basically we need to create two forms, the first one will be the Main form and second will be the Sub Form which we will integrate within the Main form later.
Please follow the below steps to configure Sub Form in your survey.
Step 1
Login to your GoSurvey account with your credentials. It will take you to your account dashboard.
Step 2
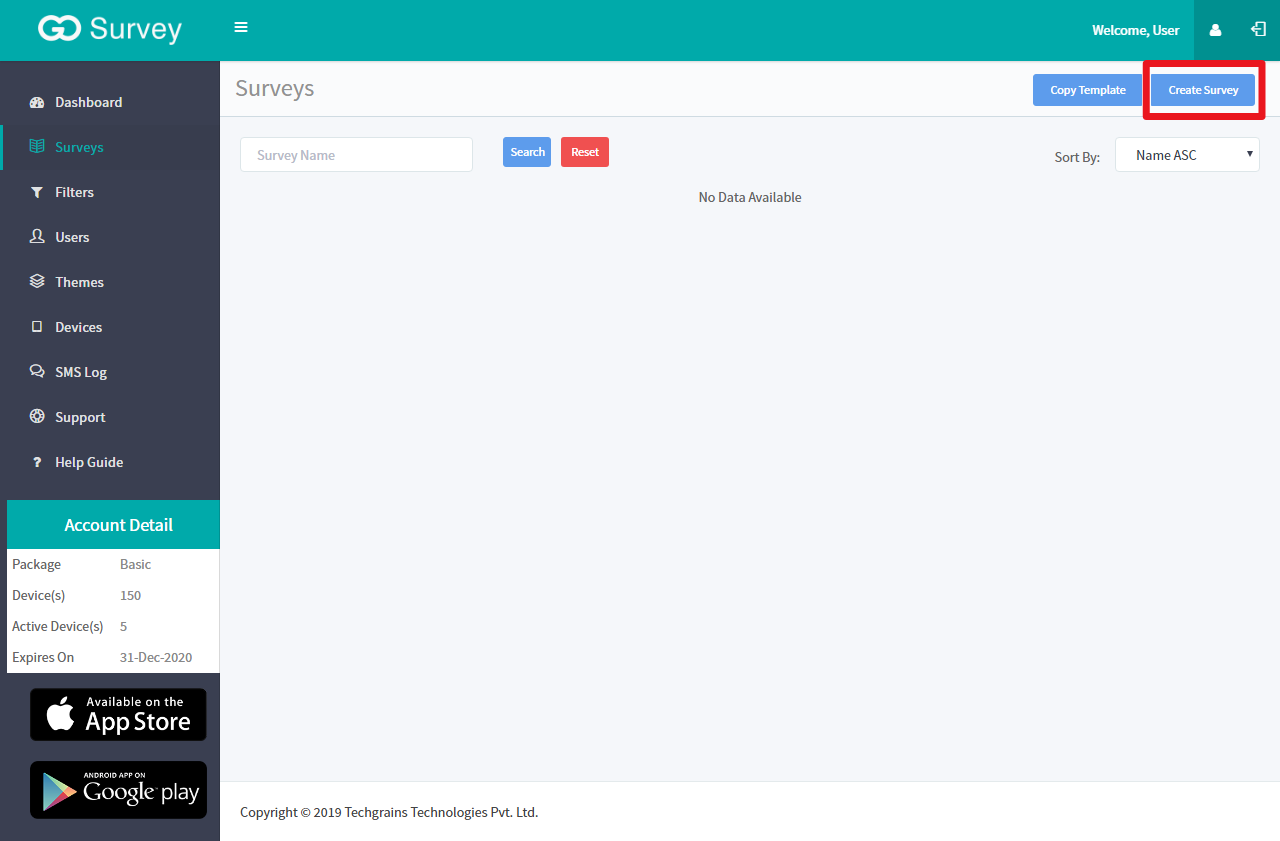
The Sub Form configuration starts with creating the main form first. To get started, click on the Surveys option present at the left panel.
Here you will find a list of all the surveys that you have created previously.
- If you want to add Sub Form in an existing survey please select the survey of your choice.
Or - Click on the Create Survey option present at the top-right to add Sub Form in a new survey.
- If you have created a new survey, after setting up the survey details you will arrive at the Questions screen. Create questions of the main form here by selecting the required question type present on the left panel. Double-click or drag & drop the ones you want.
- Or
Click on the questionnaire icon to directly jump to Questions screen. Create questions of the main form here by selecting the required question type present on the left panel. Double-click or drag & drop the ones you want.
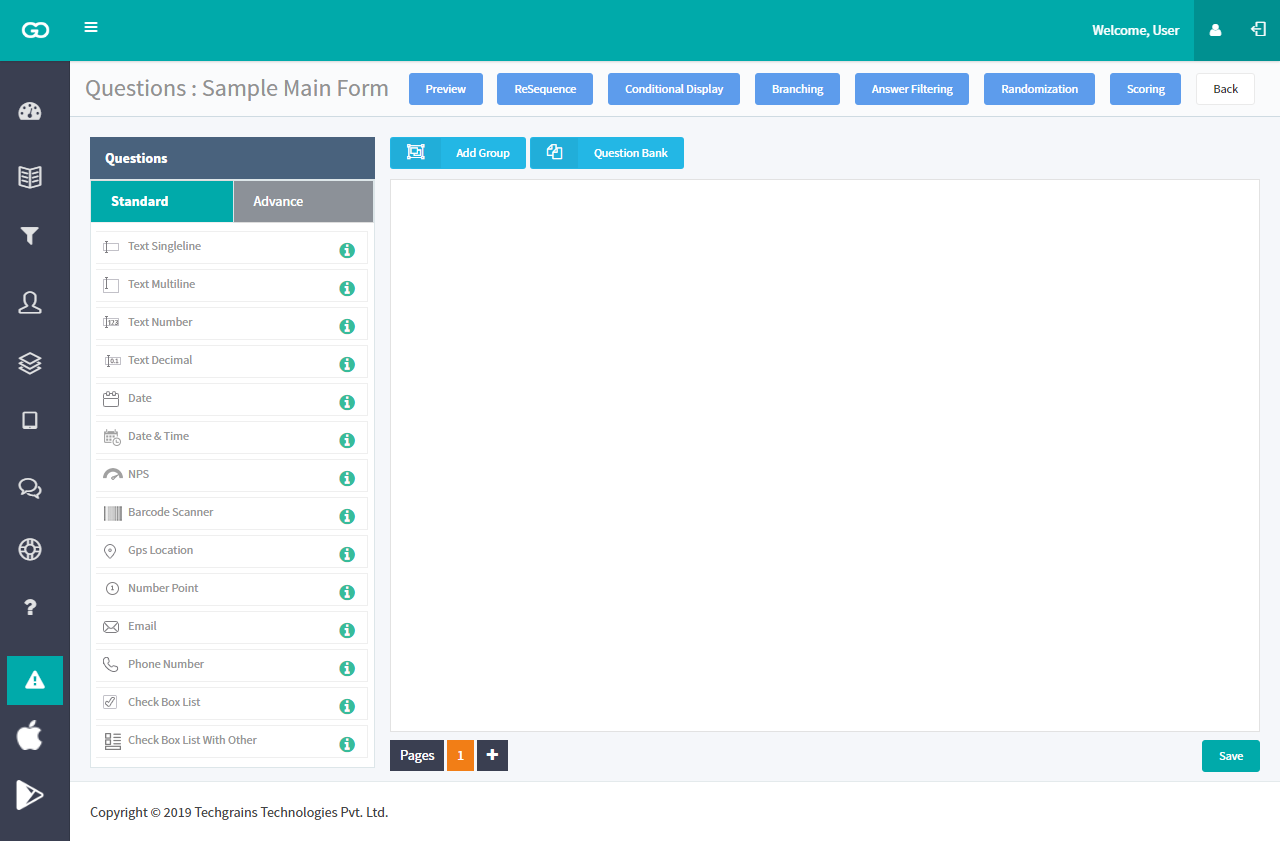
- Once you're done with creating questions of the main form for your survey, add the Sub Form question type to your existing question list.

- Type the question in the space.
- Click on the setting option for the question type by clicking on the drop down.
- You will be asked to choose the Sub Form. Please ignore this option for now.
- You will be asked to choose Minimum and Maximum number of forms.
- Minimum number of forms means that a minimum of forms will need to be selected to proceed with the survey. For ex - 3.
- Maximum number of forms means that you cannot add more than a defined limit. It will not let you add more forms.
- We recommend if you do not have any requirement to put a limit to add a defined number of forms, please leave the field empty.
- Click on the Save option and Publish the survey.
Step 3: Now, let’s understand how to create questions for the Sub Form.
- Click on the Surveys option from the left panel.
- Create a new survey by clicking on the Create Survey option on the top-right.
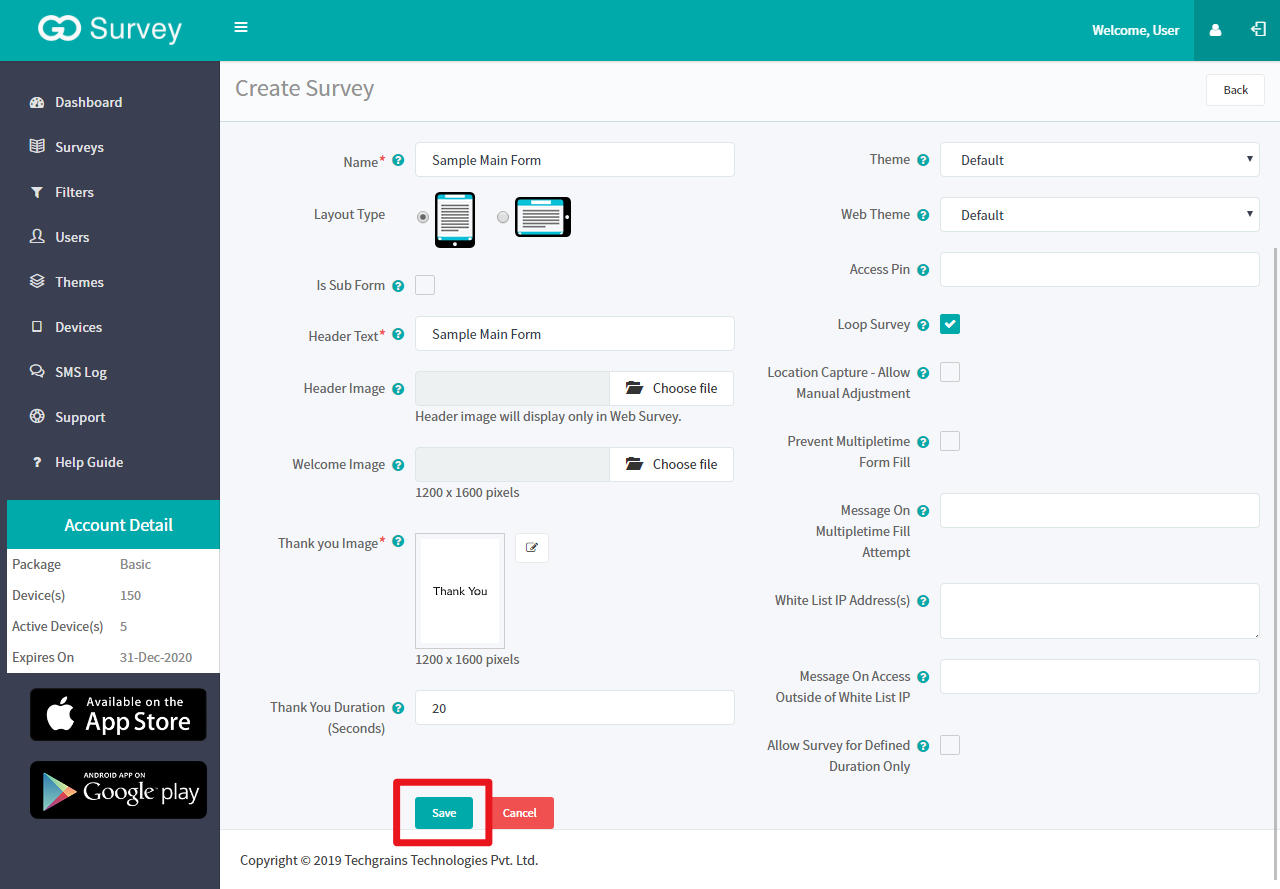
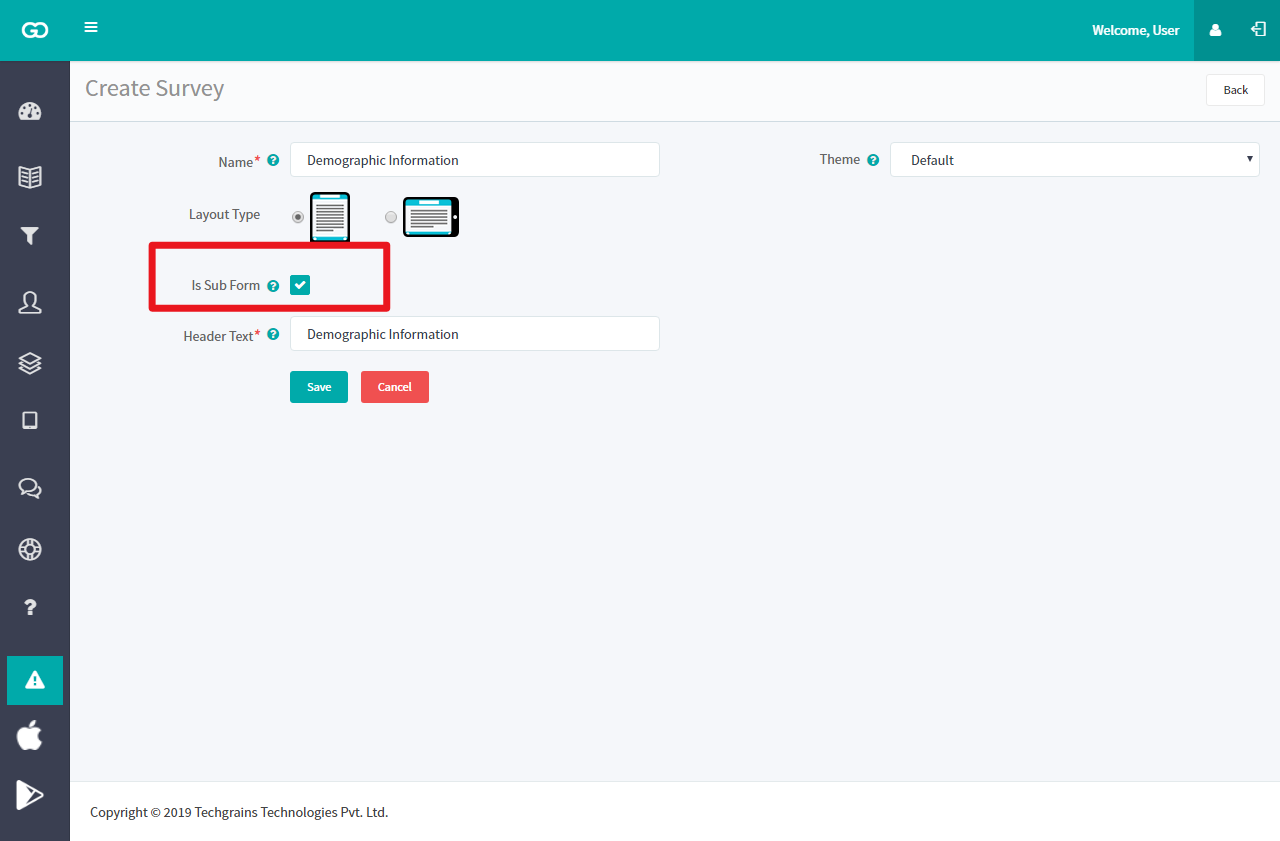
- On the Create Survey page, you will find a checkbox option - Is Sub Form. Select it.
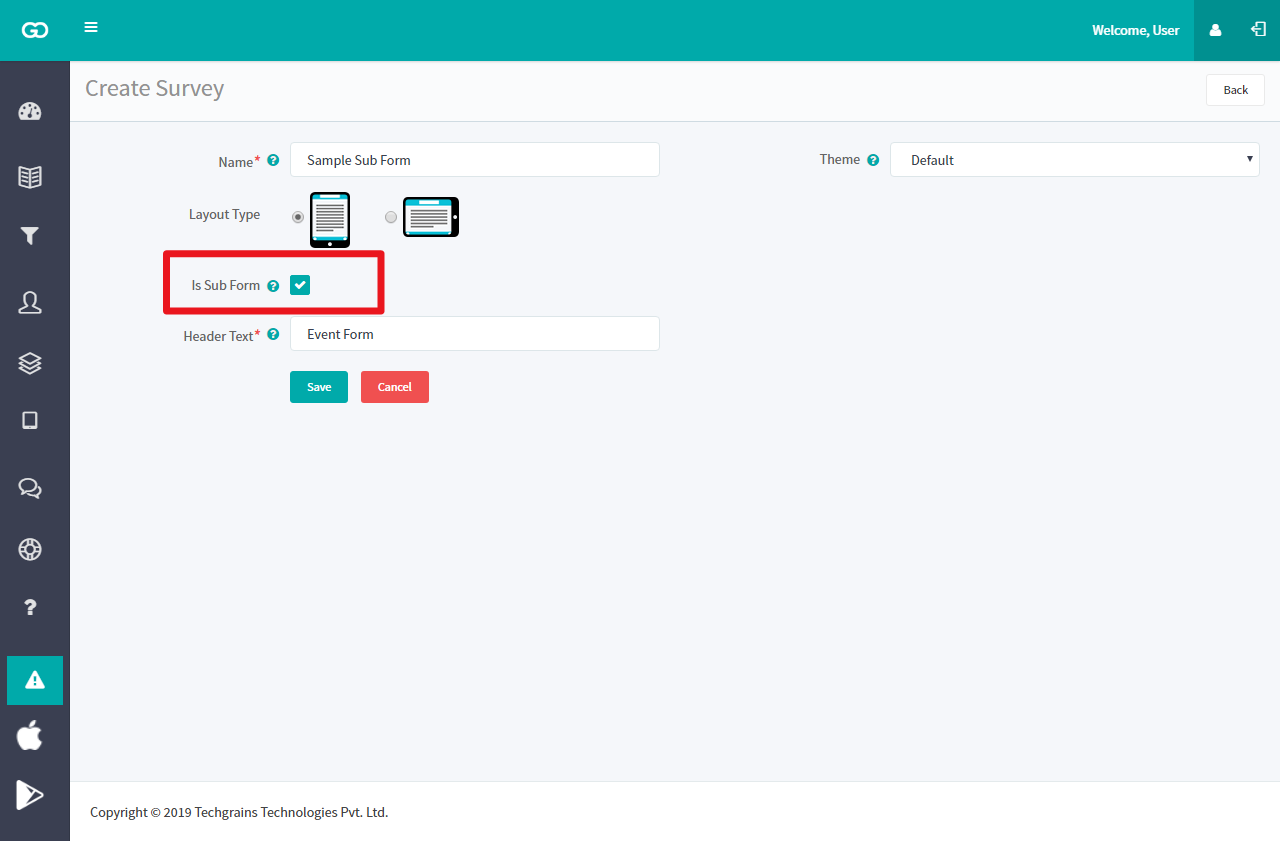
- You will be asked to enter your survey name, header text and theme, once entered, click on the Save option and you will arrive at the Questions screen.
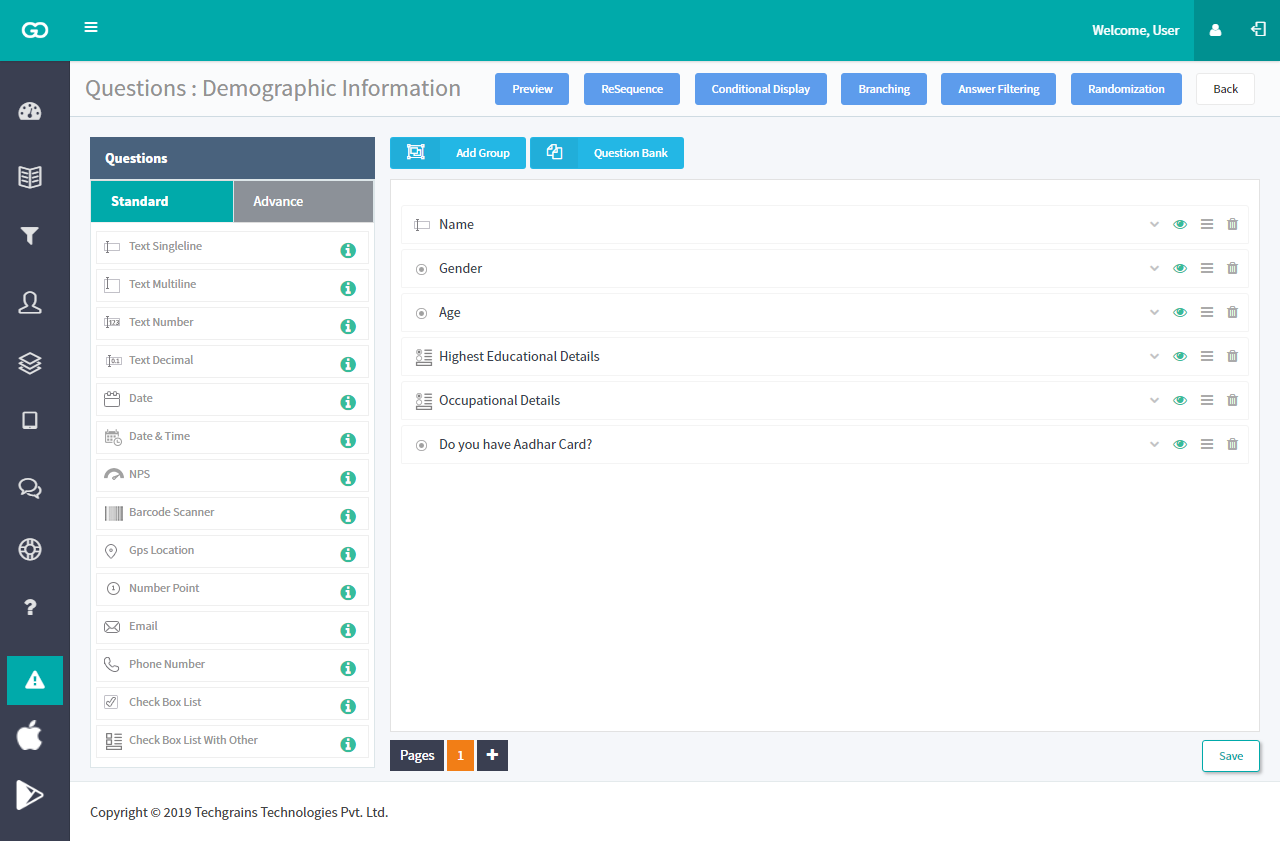
- Configure question for your Sub Form in the same way as you did for the main form.
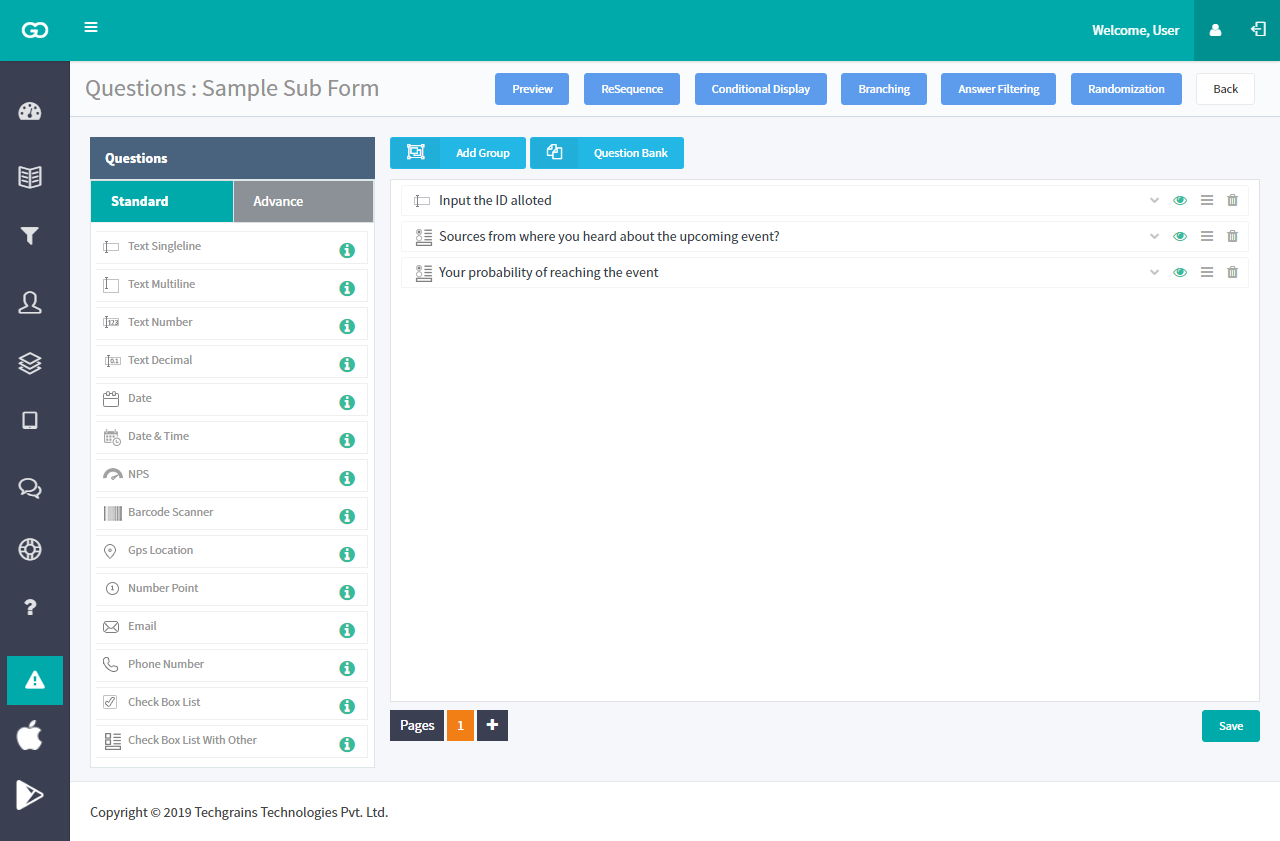
- Select the question type you wish to include.
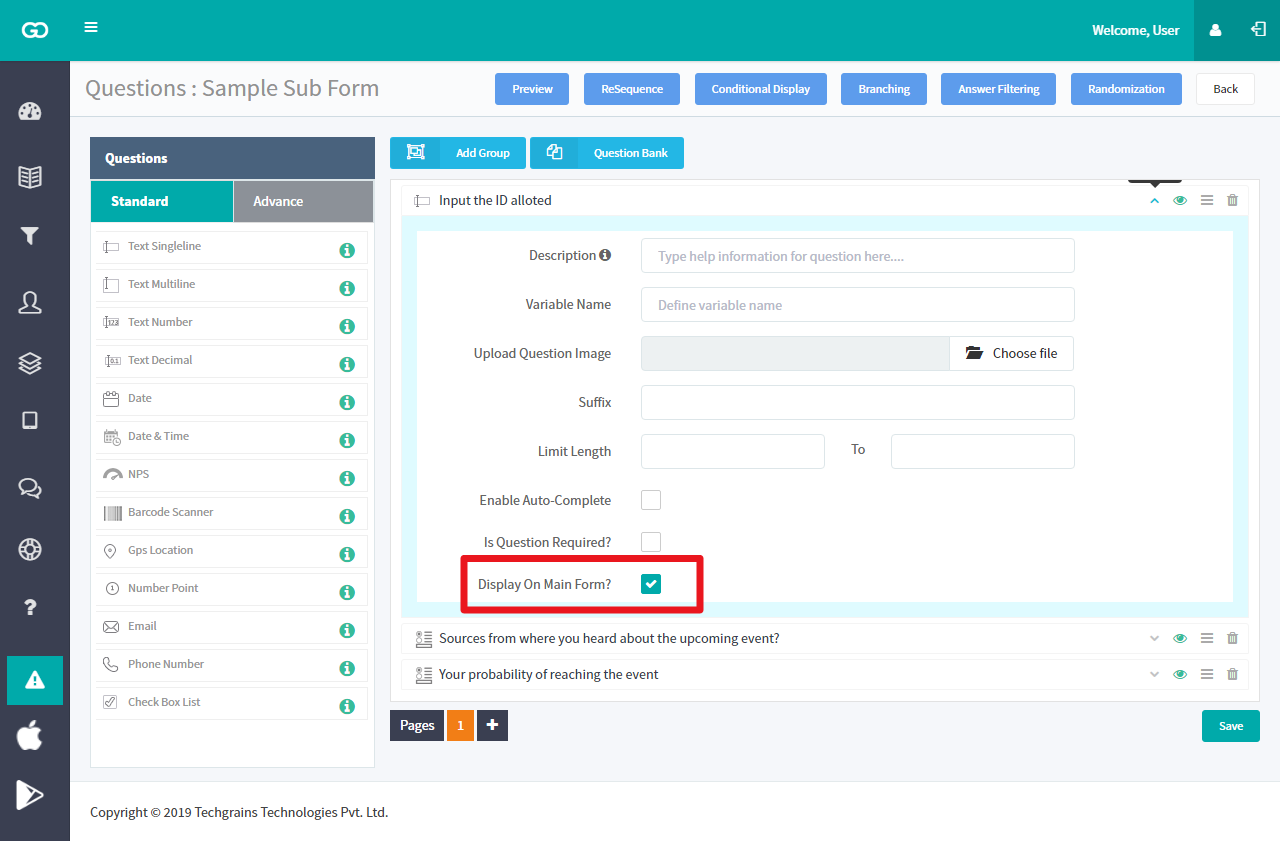
- Under the setting in each question type you will see an option of Display On Main Form? You will have to select it for any one question. This function helps to entitle any one question of Sub Form as a Unique Identifier, through which one can Identify the Sub Form response saved in Main form during data collection.
Step 4
Save the changes and publish the survey.
Step 5
In the final step, you will now have to include the Sub Form questions that you created in Step 3 into your main form. To do that, please follow the below steps.
- Go back to Surveys option and select the Main form survey.
- On the questions screen, click on the setting option for the Sub Form question type.
- Select the Sub Form that you created in Step 3, from the drop down and click on the Save option and Publish the survey.
To better understand, let’s take a scenario.
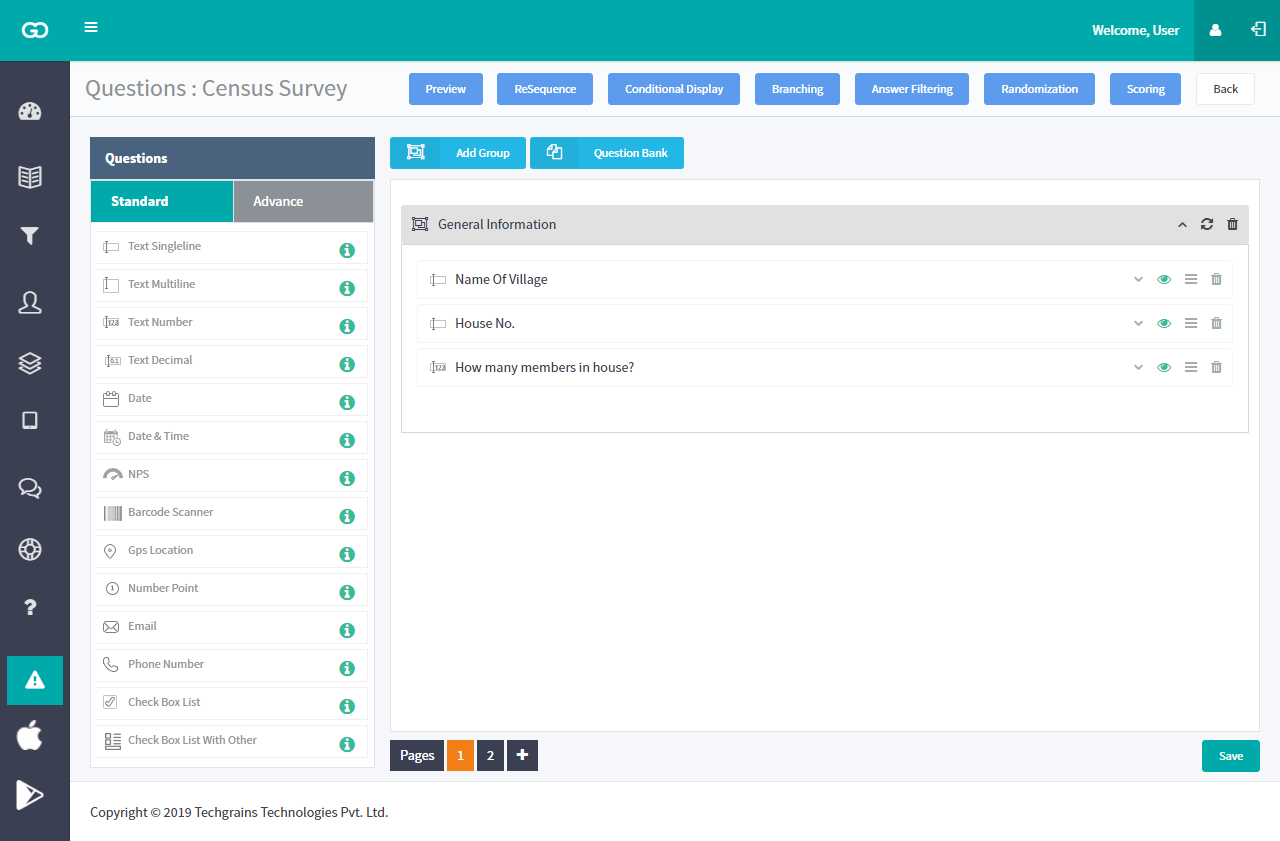
Let’s say a project is to collect demographic information of each member of the house in some particular village. So here we will create the Main form with general information of village and house and Sub Form with demographic information of the members.
Step 1
Create the Main form, by clicking on Create Survey button on the top right corner.
Step 2
Insert all the general information related to the village and the house. Like Village Name, House Number and all.
Step 3
Once all the general information is created, Now it's time to create another form with questionnaire for the demographic information for members of the house. But before this first we will use the Sub Form question type in Main form.
(a) Name the Sub Form “Members Information” and Click on the drop down arrow from the right corner of the question. Here you will see three fields.
- Sub Form
- Minimum number of forms
- Maximum number of forms.

Keep the Sub Form field blank as of now. And fill the rest two as required. Minimum and Maximum number of forms help to put restrictions on the number of Sub Form that to be filled.
Step 4
Once the Main form is complete, Save and Publish it.
Step 5
Now let’s Create the Sub Form with demographic information. Click on “Create Survey”
Step 6
Give the Survey Title and Heading and Check on Is Sub Form?
By doing this you are allowing this particular form to act as a Sub Form.
Step 7
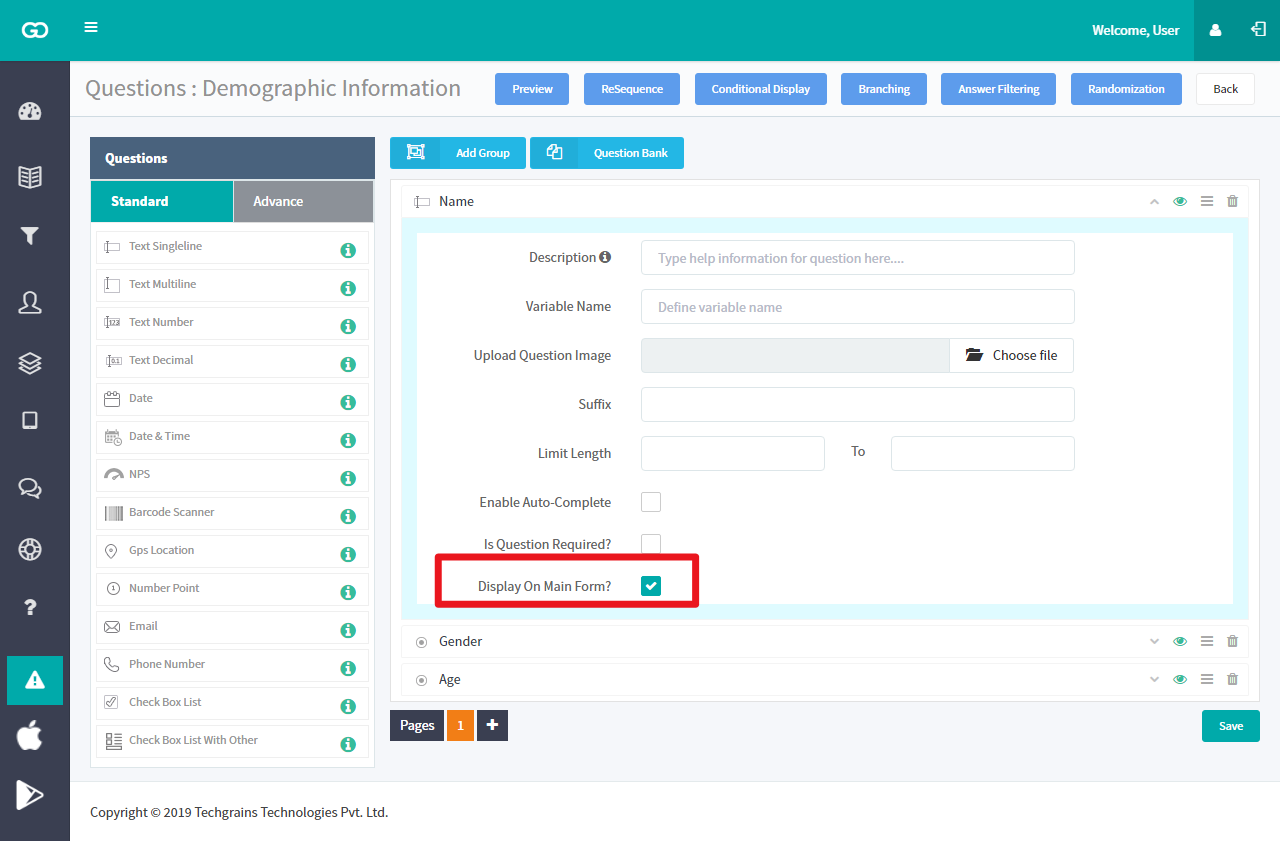
Now add all the questions required for demographic information.
Step 8
Select any one question that will act as a Unique Identifier of response collected in Main form. Here we have selected Question Name as Unique Identifier by ticking the Display On Main Form? Check box. Once done save and publish the form.
Step 9
Open the Main Form again and go to the Sub Form question type that we saved earlier.
Step 10
Click on the drop-down arrow from the right corner and go to the Sub Form field and Select the Sub Form from the drop down that we recently created.
Finally, Save and Publish it.

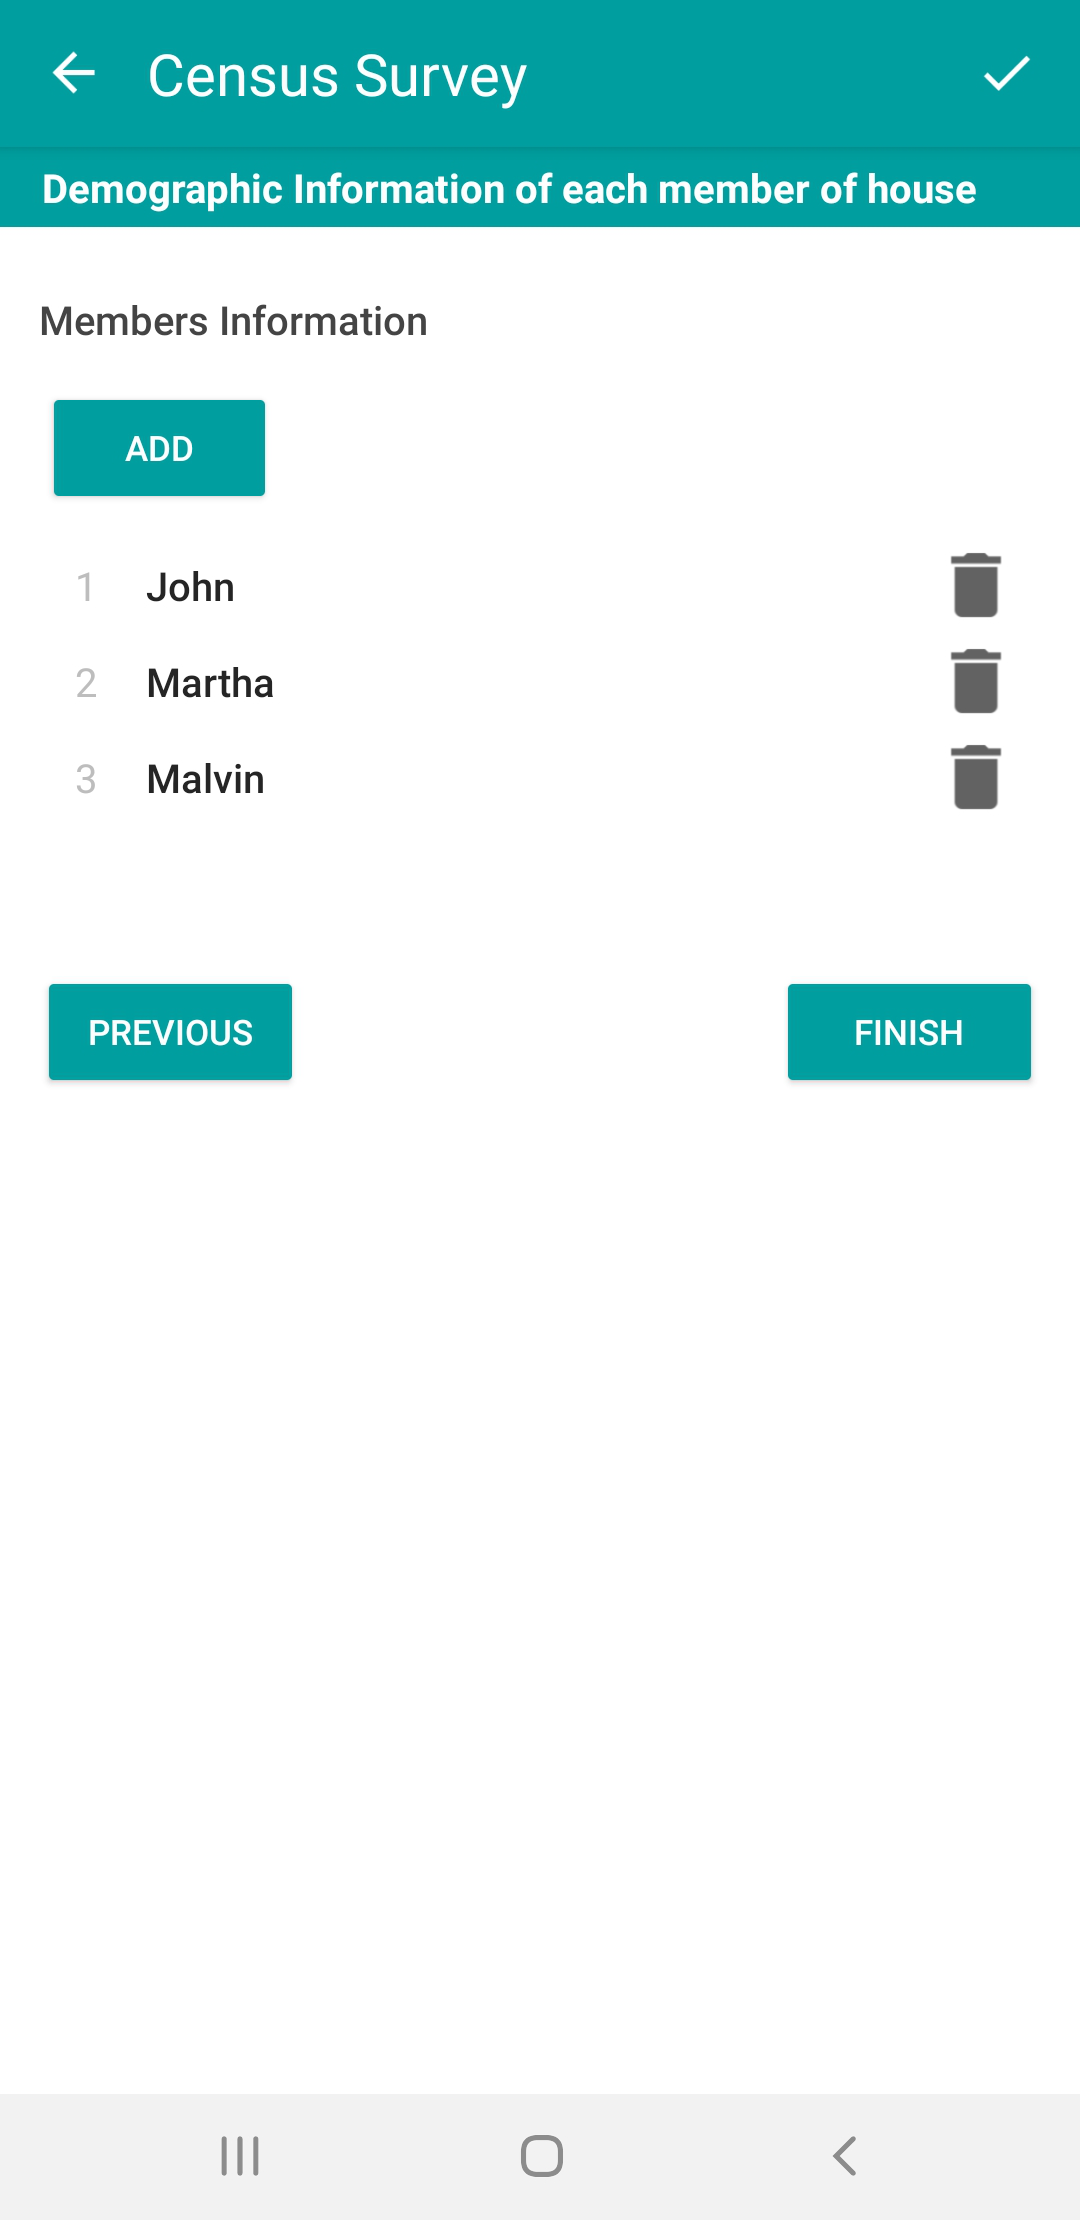
That’s it. Below is the Image of how it will appear in the mobile/tablet application.